Pages

 photo Home_zpspchzwjez.png  photo Patterns_zpsffe5v7nd.png  photo Tutorials_zpsplo1y0ea.png  photo 193faa8a-319f-4666-9915-a2cc9af19bda_zpsah1i88qv.png  photo 1aff47d5-9779-4086-ae8c-7c8a885b6c47_zpsyyyqf1xu.png
Showing posts with label Sewing Techniques. Show all posts

Saturday, August 1, 2015

Making a Pleated Mesh Pocket


Yesterday I wrote about mesh pockets, so here's how you can make a pleated mesh pocket. These are great for bigger items. This is the side panel/gusset piece for a big tote bag that I use when I'm traveling.

You'll need mesh. I use laundry bags and hampers. And you'll need binding. I make my own - here's my tutorial.

1. Measure your pocket. I made mine 2" wider and about 4" shorter (2" top and 2" bottom) than the side panel. Cut your mesh.

2. The pocket top binding is the width that I cut (2" wider) BUT the bottom is the width of the side panel/gusset.

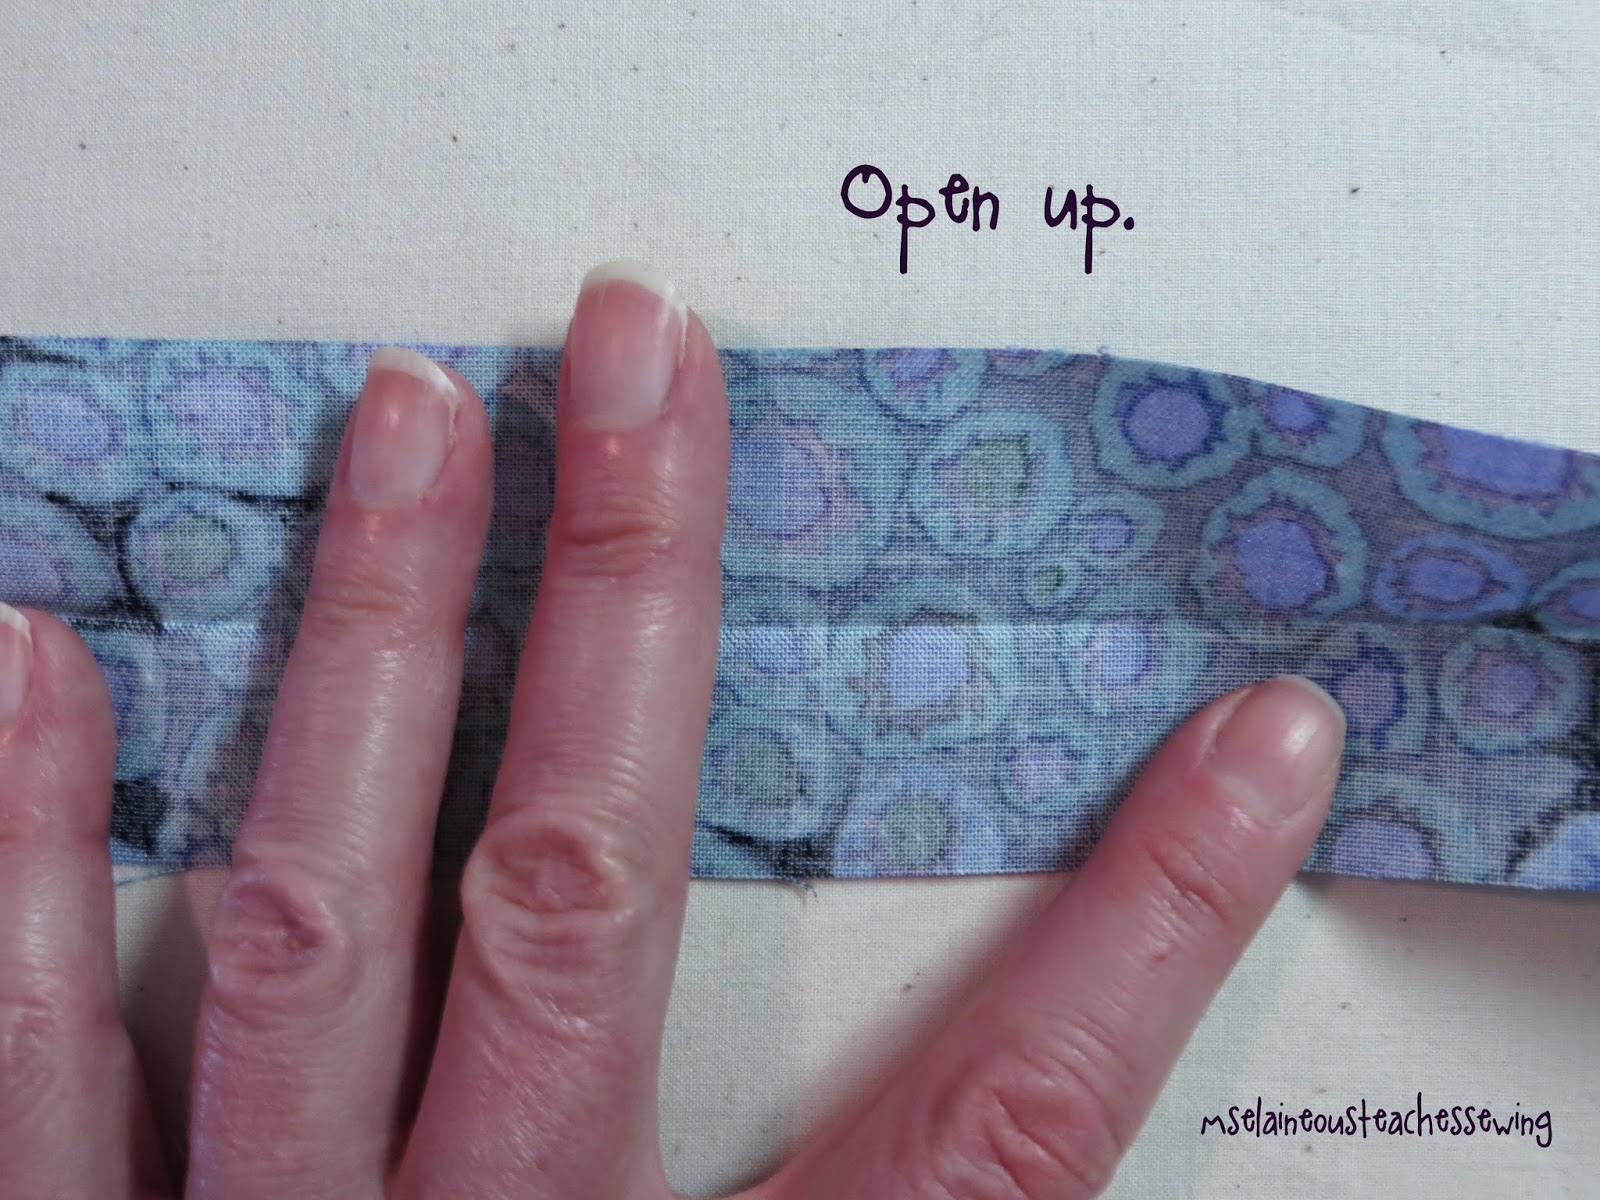
3. Add the binding to the top of the pocket. Here's some help.

4. Open the bottom binding and mark the middle. Ignore the other marks here-I was experimenting!

5. Next, using this as a guide, sew the binding to the mesh BUT stop at the middle mark.

6. Remove from your machine.

7. Line other (unsewn) end of the mesh up with the the other end of the binding. You'll have excess fabric in the middle.

8. Move the extra fabric so it's out of the way and, starting at the middle point, sew the remainder binding to the mesh. DON'T sew the pleat yet!


9. Remove from your machine.

10. Press pleat flat as shown.


11. Sew pleat in place. It will look like this.

Notice that the pocket bottom is narrower than the top.


12. Flip binding to right side.  Attach mesh pocket to your project by sewing it along the TOP and the BOTTOM of the binding.


How will you use mesh pockets!?


Thursday, July 23, 2015

Cute Monogrammed Pillow!

I think she likes her pillow! A reader sent me this picture of her daughter with her monogrammed pillow - I love it! She picked out the fabric -- nice choices! Thanks for sharing Andrea!

Want to make one? Here's the free pattern - Primp My Pillow. I provide instructions, a link to the letters, and another link to help you make it zippered.


Sunday, July 12, 2015

Free Pattern: The Luggage Tag


I finally found some time to get this pattern written up. My notes were a scribbled, incomplete mess, so I had to make another one just so I could figure it out! It's a quick project, though. I use the same "turning" technique that are found in the Composition Book Cover and the Breezy Business Card Holder. So much easier to make!

SUPPLIES:
Fabric for the exterior, lining, and loop
A small piece of vinyl. This can be from anything, including the package that sheets come in.
A walking foot
A buttonhole attachment


Thursday, July 17, 2014

Sewing a Gusset

I just added a free tutorial on sewing gussets. This is NOT a boxed bottom with corners cut out!

Gussets involve a little more measuring, but they are quite basic. These are gussets:

Trigger Tote


Upcycled Sweatshirt Purse


Purse Insert


Try it out!

Tuesday, June 24, 2014

Zipper With Binding


I recently finished up this toiletries bag. I quilted it, which means that I had some raw edges...so I had to figure out how to manage the zipper. 


I decided to make some 1/2" Double Fold Binding (I didn't cut it on the bias) and wrapped it around the raw edge of the quilted fabric.


Once I did that, I simply placed the bound edge along the zipper (both right sides up), and, using my walking foot with the needle moved over, sewed it to the zipper.


In the picture above, you can see the two rows of stitches - one that attached the binding to the fabric and the other that attached the zipper to the fabric.


Here is the view from the back.

I really like how this looks; it adds a nice pop of color and contrast to the zipper area!

Thursday, May 22, 2014

How to Make Extra Wide Double Fold Bias Tape


I typically make my own bias tape/binding. OK, rarely is it ever "bias" tape - I don't need it to be cut on the bias. But...if you take a good look at Wright's Extra-Wide Double-Fold Bias Tape, one side is wider than the other. This makes it easier to sew to your project.

Here's how I make my own. You'll need a bottle of spray starch and a hot iron.

First, cut your fabric so it is 2" wide (or desired width) by whatever length you need. Spray the fabric with lots of starch. This creates a nice crease that you'll need to follow when sewing it to your fabric.

Then....


 Fold back up and....


When I sew this to a project, I typically sew the narrow side to the back, then flip it around to the front and sew the other side down. I do this because it looks better from the front! Good luck! And be sure to check out my Craftsy Pattern Shop for free patterns and tutorials!


Monday, January 6, 2014

SEW BAD: 14 Sewing Habits that You Need Break!


Last year, my most popular post was my review of 13 bad sewing habits (in honor of 2013). Now it's 2014, so I thought I'd add 14 more. Many of these are based on the comments that you, the reader, provided! So here we go...

(14) Sewing in the dark. When I first start sewing, I had amazing eye sight. Now I'm blind without my bifocals. For me, great lighting is a must. I'm lucky to have a sister who works for a cardiologist. When they got new beds (is that what they are called?), they got new floor lamps. But the floor lamps were those lamps that we ladies are quite familiar with...you know...not the ones a cardiologist would use. So I have an amazing Brewer Halogen 35 Exam Light! Use whatever works, but stop sewing in the dark!

(13) Not taking the time to press properly. You might go too quickly, you might iron when you should press (and stretch the fabric), you might use steam when you shouldn't, you might use the wrong temperature...whatever the problem, please take time to press!

(12) Watching TV. I don't have a TV in my sewing room, but one of you mentioned that this was a bad habit - mainly because it's distracting. This is especially dangerous when slicing fabric with a rotary cutter! YIKES! And to be honest, I can't imagine watching Downton Abbey while I'm sewing! 

(11) Being careless with your bobbin. One of you mentioned to be sure to thread your bobbin correctly. This is a tension issue - bobbins are wound and threaded in a particular direction for a reason. I've seen lots of bobbin problems: adding thread to a bobbin that already has thread on it (only wind thread on to an empty bobbin); winding the bobbin wrong (read your manual if you are in doubt), placing the bobbin in the machine in the wrong direction (again, check your manual). Also, for a drop-in bobbin, make sure the thread is inserted correctly. If I would get sewing quickly, the bobbin thread in my Janome would pop out of the tension and be all loosy-goosy. I could hear it happen!

And one more thing that a few of you mentioned...thinking that there is enough thread in the bobbin to finish a project. Ah, we all know it runs out with about 2" to go!

(10) Sewing while on meds. OK, I believe in sewing therapy, but there are times that we need to take some cold medication (or similar) that makes us drowsy. Probably not a good idea! Thanks to the reader who suggested this!

(9) Putting pins in your mouth. I rarely use pins, so this is not a problem for me, but, yikes....it's an accident waiting to happen. I love my magnetic pin holder. I have several of them. Get those pins out of your mouth! And speaking of pins, you really need to stop sewing over them - if hit a pin with your needle, you can jam that pin into your machine. You machine will hate you! =)

(8) Using a folding chair. My back is sore just thinking about this! I use an office chair - but I have a dedicated sewing room. For those of you sewing a the dining room table, make sure you are getting good support and that you are sitting at the correct height. This Sewlutions Guideline might help!

(7) Not taking breaks. I have a really bad habit of sewing for long periods of time. But sometimes it's just a good idea to take a break, especially when you are struggling. I stretch and go for a run on my treadmill. It clears my head and allows me to problem solve. Do what works for you!

(6) Not practicing new techniques prior to doing them. I'm a teacher who really believes in trying out new techniques. I've posted lots of tutorials in my Craftsy Pattern Store with the goal of helping you learn techniques - instead of being just a project sewer! So practice the technique prior to trying it on a project. Trust me...I've ruined a few projects because I thought I could figure it out. 

(5) Being afraid of zippers. I know. I was there. My friend Caitlin sent me directions for installing a zippered pocket. I was totally freaked out and sat on it for about three weeks. I finally mustered up the courage, got out some scrap fabric and an old zipper, and tried. It was hideously wonky. But I quickly figured out what I was doing wrong. I tried again. Now I can't get enough of zippers. Go to my Craftsy Pattern Store to download some free zipper tutorials! BTW, I buy all my zippers at ZipperStop!

(4) Being afraid to make a button hole. It's all about practicing. Yes, the button hole attachment looks a bit intimidating, but dig out some scrap fabric and your owner's manual and start playing. I think you'll be surprised how simple it is. 

(3) Storing thread out in the open. Yes, it's cute to hang thread on a peg board. My mom did that. In fact, I have a lovely pink peg board. But all of my thread is safely tucked away in drawers and jars. Why? Thread collects dust.  That dust gets in your machine. I once wrote about this...

(2) Using pens to mark up fabric. And by pens I mean pens, like Bic. Use pens and markers designed for marking fabric - or you might permanently stain your fabric. I prefer water-soluble markers and small pencils. But you still need to test them. Even markers designed for fabric can stain!

(1) Guessing when you can look it up. The internet wasn't around when I learned to sew, but I was lucky to have a talented sister and mother who would answer my questions. Now I look things up. I watch YouTube videos. This Craftsy class looks great...40 Techniques Every Sewer Should Know. Sure, some of the techniques are for projects you won't make, but the techniques might help you with other projects. I never considered myself a quilter, but I use quilting techniques ALL. THE. TIME. on non-quilting projects!

Anything you'd like to add?

Friday, September 13, 2013

Are You Getting Too Comfortable?

I was sitting in a department meeting this week (I teach at a local university) and we were discussing the fact that our classes often push students to think in ways that make them uncomfortable. The specific class we were talking about was one on how the media shapes our reality. It got a little heated when one of my colleagues said that he lets students know that they can leave if they aren't comfortable with the topic...and about five of us (me included) interrupted by exclaiming, "We teach college! It's our job to challenge them and to make them uncomfortable!"

I don't teach media-related courses, but I do teach the class that no college student wants to take: public speaking. So yes, the nature of the course is to be uncomfortable, to recognize that feeling, and to get through it. I'm fun but stern - and my students know that I will guide them through it. When they say, "I'm nervous." I reply, "You and everyone else. You can start now." It's amazing to see them transform over the course of the semester. And when we are done, most exclaim, "It wasn't nearly as bad as I thought it would be!" So being uncomfortable forces them to grow. Welcome to life.

So what does this have to do with sewing? How many of us out there are getting too comfortable with our sewing? We make 100 versions of the same thing. We stick with what we know. We avoid trying new fabric or a new technique. We are totally comfortable with being comfortable.

I can's say that I ever been described as "comfortable." I've lived in five states and traveled to fourteen countries. So yes, I push myself out of my comfort zone. I've done the same with my sewing. A few years ago I proclaimed that I wasn't a quilter. I now quilt. And there's been a pay-off - every time I sew, I use techniques I've learned from my quilting friends. I wasn't into making clothes...until...I took a class on sewing knit fabric. It's transformed my sewing. And a few weeks ago I made a tote bag out of Shannon Cuddle (plush fabric) and faux leather - two completely different fabrics. The tote is awesome (the free pattern will be available for download sometime in the next few weeks) and I learned a lot about those two fabrics!

Here's my take - don't be afraid to try something new and possibly screw up. In higher ed, we refer to mistakes as "teaching moments." Something can be learned from every adventure; so explore all that sewing and quilting has to offer. You might like it and you might not, but I truly believe that we all get something wonderful out of being uncomfortable!


Monday, April 1, 2013

Crazy Boy Pillows...Are Done!


The pressure was mounting when it came to finishing these two pillows. The twins were asking their mom when they would be arriving! 

So here they are! A truck hauling a fan and a pirate ship pulling a sled! Crazy!


I used my Bernina Free Motion Couching foot to create the clouds. I don't get to use this foot that often, but when I do, it's pure joy!

I wasn't really careful or particular when I stitched up the finishing designs on these pillows. I did some fast applique and regular couching with embroidery floss.
 

I also tested out some fancy stitches to create the chain that's used to pull the sled.


And finished up the fan with some basic free-motion stitching. I drew the circle for the fan cage and sewed on the mark.


Now let's see if I can get them shipped tomorrow!

Monday, November 19, 2012

What Plumbers Could Learn From Us.

When I walked into my house on Friday, the thermostat read a cool 59 degrees. I simply hit the "up" arrow and the furnace came on. A temporary fix. So much for an easy weekend of sewing. I added this to my list of home improvement projects. Ugh. Although I'm fairly handy, I don't enjoy spending my weekend fixing things. My most pressing issue was my leaky bathtub faucet. Plumbing scares me.

I don't know much about plumbing, so I searched online for videos and tutorials but found only the vague or ridiculous. I teetered between overconfident and terrified. Eventually the overconfident (and thrifty) Bia took over. I decided to give it a try. As I slowly disassembled the hot water faucet, I felt my moxie slide. What the heck was I thinking? This mechanism didn't look like anything I'd seen before. I took some pictures and headed to Home Depot. The guy in the plumbing section found the part I needed and began a cryptic, half-hearted explanation. About all I remember hearing is, "Blah...blah...blah, it's really difficult to get it lined up. You'll need a flashlight and a screwdriver....blah...blah...rubber cup and spring." I think the entire aisle of plumbing parts freaked me out. I became a very bad listener.

I came home and with some prying, got the unit apart. I did it carefully, but there wasn't much to the assembly. The main problem was that there were no directions. Nothing at all for me to follow. I slid the pieces in through the hole in the wall and everything fit beautifully. I put it all back together, and after a minor bit of celebrating, headed to the basement to turn on my water. Defeat. I could hear the water running. To make a really long story short, this continued for about two hours. I took it apart, put it back together, took it apart, ran downstairs, turned the water on. Turned the water off. Gave up. Went back. Looked at the cold water faucet. Yelled. Stretched. Punched my fists in the air. At 9 pm, turned on TV and watched John Carter.

I don't know how I managed it, but I got a full eight hours of sleep. Usually I lie in bed visualizing the problem to the point that my brain won't shut off. I now realize why that didn't happen. Most of my projects make sense. I can figure them out. This made no sense. None. Nada.

After two cups of coffee (liquid courage), I decided to hit the tub for one last try. It took an additional 90 minutes of work, and at times I felt like I was playing the board game Operation, but I did it. I figured it out. It took some tweezers and some homemade tools, but I did it. In remote villages in Africa, running water is a great sound. In the little city of Corning, the absence of running water is a great sound. And I heard nothing. It was music to my ears.

I took a celebratory walk in my neighborhood and thought about my experience. Why the heck was this so difficult? Why is there a whole freak'n wall of plumbing parts that all look similar but aren't? And who designs these parts? I think plumbers could learn a lot from us. When sewists and quilters encounter something complicated, we find a way to make it simple. We create templates, tools, and tutorials that we post and pin. We fix the problem. And we love to find and share ways to make the whole process easier. Mostly, it's free. If it's a little more complicated, we might sell something; nonetheless, our goal is to do what we can to help bring others into the community of sewing. We love our sewing communities. And our wealth comes from the joy we get from sharing and helping. 

A few years ago, I paid a guy $130 to replace the wax ring on my old toilet. A month later, my sisters visited me. They helped me pick out a new toilet and the three of us removed the old one and installed the new one. It was sisterhood at its best. Kind of like how I feel when I hang out with my sewing sisters. Everything is better when we work together!


Friday, August 3, 2012

Slipcover Update: The Hem And DONE!

Finally! Hemming the bottom of the slipcover. The end is in sight. This was the easiest step of the entire project. I kept it plain - no ruffle or pleated front - to maintain the original design of the sofa. I was also a little concerned that a ruffle or pleat would stick out funny. Plus, let's be honest, this is a lot easier!

I decided that I wanted to the feet to show. I really had no choice because I cut the slipcover even with the floor! Oops. But my sofa has cute feet, so it worked. Serendipity!

I put the slipcover and cushions on the sofa - right side out. I took my ruler and marked 2" up from the floor - my entire sofa was on the rug, so it was even.

And I marked all the way around.

I headed to my cutting table and, using a ruler, marked a line 1" up from my marks. I am creating a 1" hem.

That might not seem like much, but bulky seams hang funny. 


I cut on my 1" mark...all the way around. Then I cut ALL the excess fabric off all the seams, leaving about 1/2" to 1". Tedious. But not as tedious as what I was about to do.


I pinned and did a double-check-fitting. Looks good!

I headed to my machine to do what I dreaded...an overcast stitch...on all the raw edges...all. of. the. raw. edges. I went through three bobbins! This will not unravel!

Once I was done, I decided that I would do a zig-zag for my final 1" hem along the bottom. I don't know why I chose this rather over a straight stitch. I do like how it looks. Plus, it won't come unraveled.

VIOLA! All done!

And my cats LOVE IT!

Want to try this? Start at the beginning with Slipcover Courage!

Thursday, August 2, 2012

Slipcover Update: The Arm Front

Oh....almost done! Today's post is all about the front of the arms. As you can see...lots of clipping to get it around that curve!


Put the slipcover on the sofa wrong side out. To help me get a good fit, I repinned the arm (side) into that crease right below the curve of the sofa arm - you'll see what I mean in the picture to the left. Yes, this is a picture from yesterday's post! But it's all I have!


I draped the fabric onto the front of the arm. I stuck pins in so it would stay flat and hug the curve of the arm front. And I just stuck them in straight...all the way aroud.


I next raced the outline of the arm front. 


Cut it 1" bigger. You know the drill...


See the pins?


I pinned the arm front to the arm all the way around. I wanted this to be fairly snug, so I pulled a bit. It was a bit difficult to remove - it was on there really tight. But I am glad that it was.


I headed to the machine and followed my pins around. I didn't use my blue marker line - that just helped me cut and gauge the shape that I was sewing.

I sewed all the way around - and I clipped to help keep the shape of the curve.


And here it is!


Check out all the clipping!


It fits!


One side down and one to go!

We'll finish things up tomorrow with hemming the bottom.
Related Posts Plugin for WordPress, Blogger...