Pages

 photo Home_zpspchzwjez.png  photo Patterns_zpsffe5v7nd.png  photo Tutorials_zpsplo1y0ea.png  photo 193faa8a-319f-4666-9915-a2cc9af19bda_zpsah1i88qv.png  photo 1aff47d5-9779-4086-ae8c-7c8a885b6c47_zpsyyyqf1xu.png
Showing posts with label Sewing Projects. Show all posts

Saturday, January 23, 2016

Purse Insert


One of my Craftsy customers contacted me about the Pocket Pouch Purse Insert pattern. After she made it, she sent me a picture! Her purse insert looks fantastic - and I love the matching goodies. Way to go Carol!

Tuesday, January 5, 2016

Understanding the Transit Tote

When I decided to create the Transit Tote, I was inspired by this cosmetic bag that I had been using every day to store my make-up. I think it was from Lancome? Clinique? Estee Lauder? Who knows. I loved it and knew that I could modify it to fit my traveling needs. 

I had to adapt my Inside-Out Zipper Technique quite a bit to make this, but in the end, it's something that I'll be using to design a lot of other patterns.

I am not a fussy sewer. In a way, I'm more of an engineer who sews. That seems odd to those who know me. I'm not an engineer. In fact, my math skills end with geometry. I teach college...and I teach nothing remotely close to engineering... or art for that matter. I teach communication. But I've always loved technical writing, so writing patterns is fairly easy (and fun) for me. I am an efficient person; I streamline just about everything I come in contact with. Maybe I watched the original Cheaper By The Dozen a few too many times. FYI...if you watch the original, you'll be introduced to Frank and Lillian Gilbreth - pioneers of time and motion studies. Lillian Gilbreth invented lots of things that make our lives easier - like the foot-pedal trash can and egg/butter trays in refrigerators.

So figuring out how to make this cosmetic bag became a challenge. I made a few rough drafts and got it on the third take.

Here's what you end up working with:

1. A lid and a bottom.

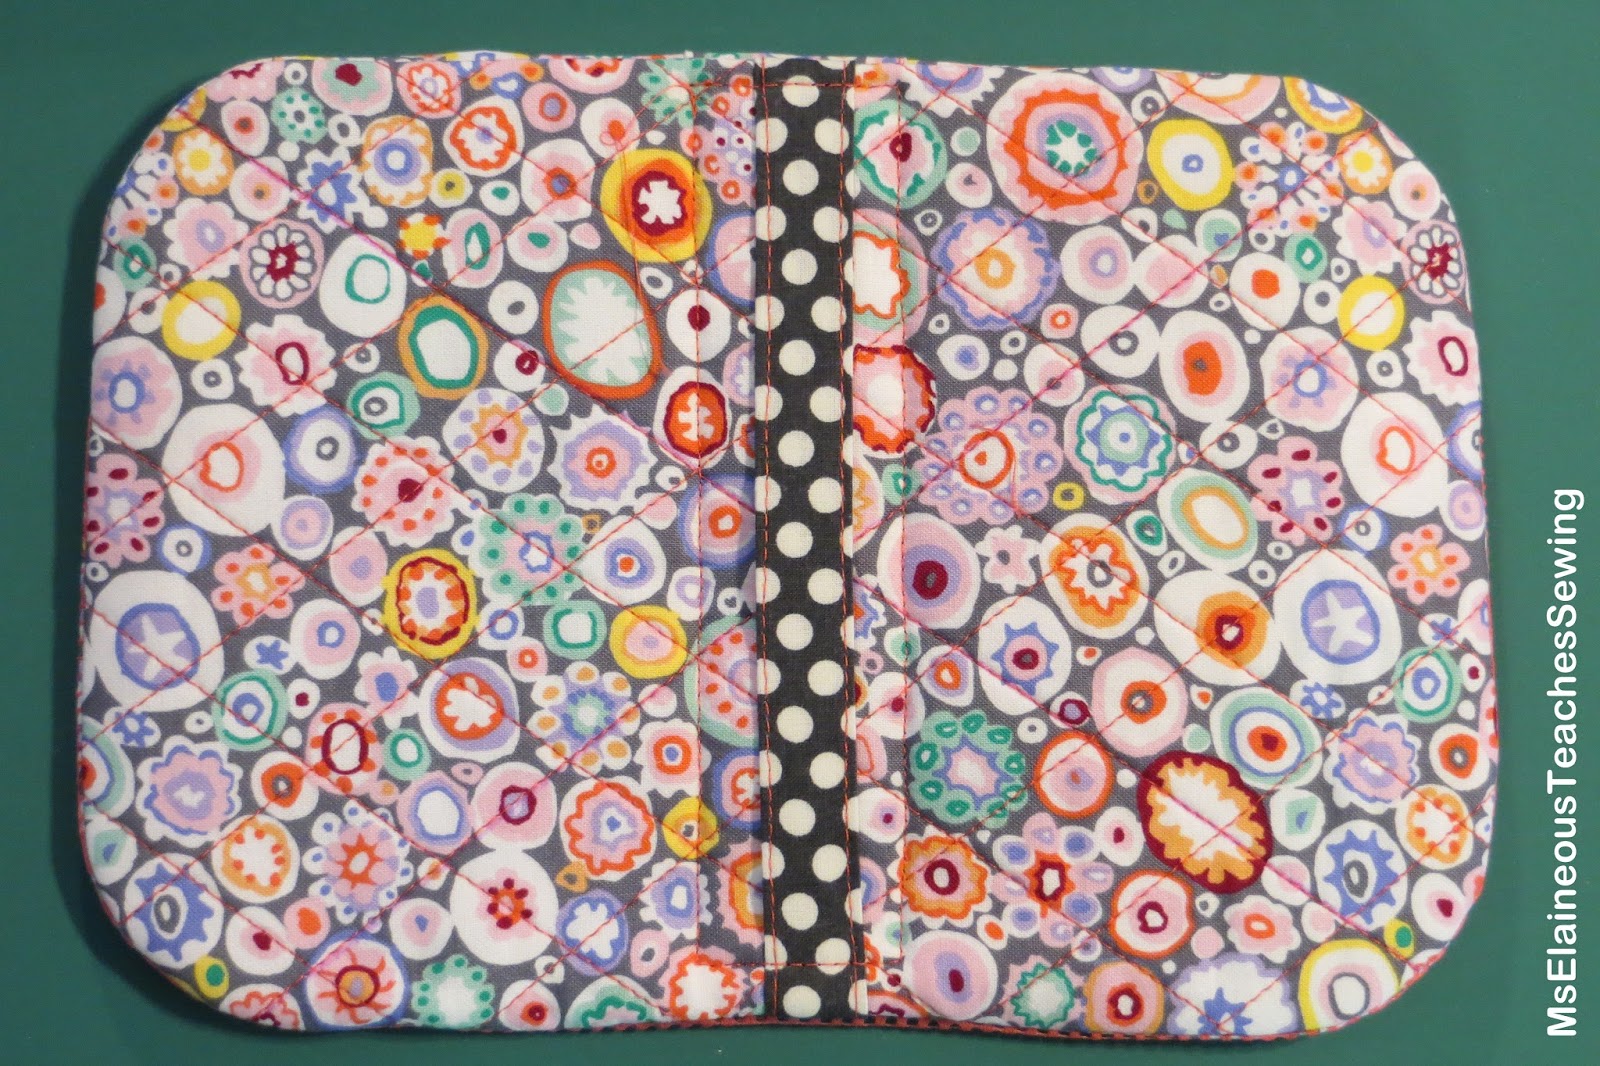
 This is the lid (inside).


The lid (outside). The gray dotted fabric is the handle.

There's a bottom piece that is similar.


2.  A zipper panel.

This goes together using the Inside-Out Zipper Technique.


When the zipper panel is complete, it looks like this.


And those three pieces get sewn together:


Sewing the bottom to the zipper panel. It's a bit cumbersome, but nothing too difficult. There are a lot of layers, so I used a jeans needle and went slowly.


The bottom is on! Now I'm sewing the lid to the zipper.


Those Wonder Clips are a life-saver!

The assembly is counter-intuitive. If you bought the pattern you'll probably wonder what I was thinking...but don't give up. Just take each step one at a time. Trust me...it looks more complex than it actually is!


Here it is. This was the third one I made.


And the back.


I'm back to work soon, but I plan on developing a backpack pattern using this technique. I bought a cute artist notebook at TJ Maxx and already began sketching it.


Monday, January 4, 2016

Transit Tote Pattern Review

I recently sent my Transit Tote pattern out for review to have someone make it and test the pattern. OK...the someone was my sister. And if you have a sister, you probably know that they are the best pattern testers! I knew I'd get honest feedback.

My sister knows a lot about sewing. She makes clothes, slipcovers, curtains, etc...; a few years ago she took up quilting. And I'm not biased (really!), but she's talented. Much more detailed than I am. She's more of a traditional sewer who sews from store-bought patterns. Needless to say, I was a bit nervous. 


She ended up making three of them - they are for her two daughters and one daughter-in-law. I love the red zippers!

The good news is that she had very few corrections - and they were additions to help someone who's familiar with traditional patterns.

Here's her review on Craftsy:

Have been sewing for decades but always used traditional patterns. Loved the pictures of the Transit Tote but when the pattern came was a bit confused by the nontraditional way it was made. Decided the best thing to do was trust the designer. I followed the directions carefully (good pics! great instructions!). LOVE IT!!! Made 3 for my daughters for Christmas. NOW the pattern makes perfect sense!! (Note: The Peltex was difficult to sew through, probably won't use it next time.)

I agree with her review of the Peltex. I prefer a tote that I can squish into my bag! You can purchase this pattern on Craftsy and on Etsy

You can read more about this pattern here.

Sunday, January 3, 2016

Purse Insert with Double Zipper


In mid-November, my friend Aparna contacted me...she and her son were flying in from Australia and traveling around the US reconnecting with family and friends. She was wondering if I could meet up in D.C. - and hang out with them and our mutual friend Dereece and Dereece's niece. YES!! I wouldn't miss it!

I wanted to make something for her son...who I shortchanged about ten years ago. See....my friend moved to Australia...and I sent her and her daughter a few things....purses. But I sent nothing to her son. I know. I'm a total loser. I make purses. That's my defense.

I knew that I had to do something especially for him, so I redesigned my purse insert and made a Dopp Kit for him (that's a fancy term for a men's toiletries bag). Although my home was being renovated, I dusted (literally) off my sewing machine and engineered this double-zippered bag.

It's just a redesign of my purse insert. I wanted to add two zippers so the bag would open wide, allowing easy access to items. I used my Inside-Out Zipper Technique. I sketched and thought about it. Eventually I just dove in and did it. The double zipper was a bit tricky, but I didn't overthink it. And it worked. 


Here one side. I had to add a piece above the zipper.


Easy access to all the contents. Which might be video game stuff rather than toiletries.


I extended the zipper flap and added a snap to keep it closed.


I'm painting my newly renovated space, but once I'm done, I plan on fine-tuning the design and posting a pattern for this bag.

Sunday, November 22, 2015

The Basic Back Pack Pattern Update

From time to time, I make some minor changes to my patterns. This usually making sentences shorter and moving diagrams. My most recent update was one of my favorite beginning sewing patterns...The Basic Back Pack.


This was really popular with the kids in my studio - they'd make a bunch for their friends. I even modified it for one girl who was a regular - I embroidered "Cheer" on it!

 Why is it a great project for a beginner? 
  • The 1/2" seams leave some wiggle-room for mistakes. Everything doesn't need to line up perfectly.
  • The cording is threaded through a casing at the top rather than a seam. More room for error!
  • The final step involves sewing side/bottom seams rather than inserting the lining in the outside and sewing along the top...and hoping it fits. 

 There's a divided  pocket inside.
 Here's a close-up of the side tabs. I wrapped the cording in tape to get it through the eyelets.

Thread the cording through the casing with a BIG safety pin or a cord threader. I have a collection of these...red..blue

FYI: I've used both for years. One of the "eyes" snapped off on the blue one, but I still use it. I LOVE this product!!


This pattern is only $3.99!

Purchase on Craftsy
Purchase on Etsy.


Saturday, November 14, 2015

Holiday Gift Ideas: Sewing Patterns


Are you thinking about making some gifts for the holidays? I've selected my favorite patterns and put them into categories to help you pick something based on your needs:

Fast and Inexpensive:


https://www.etsy.com/listing/225326408/hip-klip-pocket-accessory-large-pdf?ref=shop_home_active_7
Hip Klip Pocket Accessory Large:
I love this little little bag. I've made so many of them that I can crank one out in under 45 minutes. 

All you need is a fat quarter, two zippers, and two eyelets. I love Hip Klips, but you can use carabiners.

Why is it so fast to make? There is no lining fabric. The zippers are sewn on the fold! 

Available on Craftsy
Available on Etsy


https://www.etsy.com/listing/239897000/the-bandolier-crossbody-bag-pdf-sewing?ref=listing-shop-header-2 The Bandolier Crossbody Bag:
This is similar to the Hip Klip. It's bigger, isn't flat, and has an adjustable strap.


Available on Craftsy Available on Etsy


https://www.etsy.com/listing/84977052/wine-a-little-gift-bag-pdf-pattern?ref=shop_home_active_5

Wine Bottle Gift Bag:

This fast project it a gift within a gift. And it doesn't take much fabric. And just check out those corks! 

This is a great project for a beginner. 

Available on Craftsy
Available on Etsy 


For the Organized:


The Sewing Caddy/Purse Organizer:

This is my top selling pattern on Craftsy. It's not only a sewing caddy, but it makes a great purse organizer. 

To speed up sewing, use store-bought bias tape.


Available on Craftsy
Available on Etsy


https://www.etsy.com/listing/243513883/the-transit-tote?ref=shop_home_active_11
The Transit Tote:

These are also called Train Cases. I've seen some similar patterns but none are as simple to make as this one. I use my Inside-Out Zipper technique to simplify the whole process. 

I've included two bonus patterns: a mesh pouch and jewelry valet. Perfect for traveling.

I love this pattern so much that I made seven of them for gifts. 


Available on Craftsy
Available on Etsy


https://www.etsy.com/listing/89764148/cosmetic-bag-with-brush-roll-pdf-pattern?ref=shop_home_active_8

The Cosmetic Bag with Brush Roll:

I designed this pattern almost five years ago. It's one of my top selling patterns on Craftsy.  

My friend described it as genius. I'm still using the first one I made. This camo one went to my niece who's in the Army.


Available on Craftsy
Available on Etsy


For the Techie:

https://www.youtube.com/watch?v=eLL3dFDG0HM Smartphone Wallet eXtra:

These wallets are what my friends want as gifts. We all travel light. I used my Inside-Out Zipper technique to make zipper installation a lot easier.

Available on Craftsy
Available on Etsy


The Tech Tote Crossbody Bag:

A great gift for those who carry their tech with them. It's got lots of room for other gear. And it's all zipped up. 

I used my Inside-Out Zipper technique for this bag, too. A pattern tester described it as easy to follow with a great zipper technique. I couldn't agree more!


Available on Craftsy
Available on Etsy


For the Eco-Warrior:

The Upcycled Sweatshirt Purse:

This is another really popular pattern on Craftsy (with a 4.5 out of 5 rating).

It's a fun gift that allows you to preserve those old sweatshirts!


Available on Craftsy
Available on Etsy


https://www.etsy.com/listing/89757512/sweatshirt-back-pack-pdf-pattern?ref=shop_home_active_9

The Upcycled Sweatshirt Backpack:

Perfect for the backpack wearer. Just head to the local Salvation Army and head home and start sewing. It's nothing complicated. I include the grommet math (to make sure you equally space the grommets/eyelets).


Available on Craftsy
Available on Etsy


Thanks for supporting my little pattern business! You can also check out my free patterns for more goodies! have fun and happy sewing.

Friday, July 31, 2015

Making Mesh Pockets

I've become a big fan of mesh pockets in my totes and purses. I like them because I can see the contents of the pocket; oh, and they are really easy to make!

All you need is some mesh. I checked out JoAnn Fabrics and found some tulle. I don't particularly care for it, so I've stuck with my go-to: laundry bags! I purchased pop-up hampers from Big Lots and recently discovered these from Target. I like the ones from Target because they are big (36" x 24"), so they work perfectly for my bigger sewing projects.


Here's what you need to do:

1. Cut your pocket to the correct size. My pocket sides and bottom are sewn into the seams, so think about that. You might have to put the binding all the way around.

2. Cut and make binding. I have a tutorial if you've never made it. I prefer my method because one side is wider than the other. This should be the length of your pocket (or whatever won't be sewn into the seams).


3. Place the narrow side of the binding on top of the mesh as shown. Line up along the edges. This will be the back of the pocket.


4. Sew in the fold. I use a walking foot - it feeds more evenly.

I don't pin. I just go slowly, making sure that the edges stay lined up.


If you need to, sew binding where it's needed. This pocket is on the inside of a big tote (it's part of the side panel/gusset). You'll see the binding at the bottom of the pocket. I didn't want a pocket that was too deep. I made this pocket about 2" wider than the side panel and created a pleat in the bottom. UPDATE: Here's how to create a Pleated Mesh Pocket.


5. Flip over and wrap binding over to the other side (this will be the front.)


6. Sew the binding to the mesh as shown. 


7.  Attach the pocket. Sew dividers as desired!


You could make this zippered if you wanted!


Here it is!

You can purchase the pattern for this purse insert on Craftsy and Etsy.


Monday, July 27, 2015

Java Jacket: Free Pattern


I'm more of a make-your-coffee-at-home kind'a gal, but I have friends who swear by coffee shop coffee. So this one is for all of you...

SUPPLIES:


2 -- 6” x 13” fabric (front/back)
1 -- 6” x 13” fusible fleece
1 -- 3½” piece hook and loop tape

Get PATTERN here. (Don't "fit" it when you print - either print Actual Size or Scale 100%). Cut pattern out. You might want to transfer the markings to cardboard - it's easier to trace. 

Here we go...


1. Fuse fusible fleece to back of front piece  (following manufacturer's directions).


2. Using pattern, cut out front and back pieces.


3.  With RST, line up along bottom (shorter edge). Using a 1/4" seam, sew together.


4. Line up other side (creating a tube). Using a 1/4" seam, sew together.


5. At one shorter end, flatten fabric as shown. Try to keep it evenly distributed.

6. Using a 1/4" seam, sew this closed.


7. Repeat for the other side..EXCEPT... leave a 2" opening.

DO NOT CLIP CORNERS!!


8. Turn right side out and press flat.


9. At opening, tuck in the excess fabric and press flat.


10. Sew around the perimeter of the Java Jacket, staying close to the edge. You will sew the opening closed.


Here it is!


11. Sew one side of hook and loop tape to the back. Keep it close to the end!


12. Flip it to the front. Sew other piece of hook and loop tape to the front. Note the placement! It's about 1" from the end at the top and about 1/2" at the bottom.

If you are unsure about the circumference of the cup, wrap the Java Jacket around the cup and, using a fabric marker, draw a line at the end. 


Does your favorite coffee drinker use a loyalty card? Why not add a pocket!?


Jazz it up with a machine embroidery designs. Just head to Embroideries and search "COFFEE" - some are free, most are really inexpensive.

 
Enjoy!
And here's a free pattern for an easy-to-make round zippered pouch. No, you don't have to cut circles!!
Related Posts Plugin for WordPress, Blogger...