Showing posts with label cats. Show all posts
Friday, August 30, 2013
Sew Mama Sew Pet Bed!!
I think I hit the big time! My pet bed pattern is now available for download at Sew Mama Sew! YAY! And don't you just love the Shannon Cuddle? Super soft. So soft that my cat actually loved posing for the picture!
Be sure to head over to Sew Mama Sew for the free downloadable pattern!
Friday, December 21, 2012
Christmas Sewing Frenzy Part Three: Flip Flop Quilt
With some help, I got gift #3 done- my flip flop quilt that I started back in August. It nice and summery – which I need today…a cold and snowy (and gray) New York winter day.
And here is my cat helping me quilt it. Don’t you love the back fabric?! The dots get bigger toward the outside edges!
I embroidered the tag, “When I think of summer, I think of you!” This is for a childhood friend who lives for warm, sunny weather. And don’t worry, she doesn’t read my blog. I don’t think she reads much at all. She’s too busy doing stuff!
Tuesday, December 11, 2012
Cats on Quilts
Today is my one break from final exams, so I decided to finish up a quilt that I started in August. My cat, however, had other things in mind. She's a sweetie, but...girrrrrl, I'm trying to get this thing spun and done!
Tuesday, August 7, 2012
Felines on Fabric
In honor or Pets on Quilts 2012, I thought I'd share a little of my life with my cats. They love to join me in my sewing room.
Star Wars Baby Quilt. Both my cats hung out with me when I made this awesome Star Wars quilt.
But they wouldn't get off of it.
Still won't move. I bribed them with treats. That usually works.
50th Birthday Quilt. I was on a deadline with this quilt so my polydactyl used her extra toes to move the fabric as l quilted. At first I thought that she was playing...but she's such a sweetie, she was actually helping!
We both took a nap afterwards!
Sofa Slipcover. Lots of fabric provided ample playtime. Unfortunately, I was not in the mood to play. She loves tents and kept crawling underneath as I tried to pin.
The Peaches Purrrse. OK. She helped me with this one. She's very proud, so I named it after her.
The Pi Pouf. Here's are a few suggestions - don't let your cat sleep on a cardboard box when the (1) cardboard box lid isn't taped closed, (2) the cardboard box contains a bag and in that bag are millions of little polystyrene beads. But always have a camera ready when the cat starts to sink. Poor thing!
This is my friend's cat. The cat survived and my friend went on to make three more Pi Poufs!
Wednesday, August 1, 2012
Slipcover Update: The Arms
Time for the arms. These had me a little worried - mainly because they are curved. But with some basic clipping and pinning I got it all figured out! The arms took another 1/2 of a drop cloth. That brings our count up to 2 1/2 drop cloths.
As with the frame, this is all about draping, marking, pinning, and cutting.
I started by draping the fabric over the arm. The slipcover/frame is wrong side out. I gave myself plenty of extra fabric - I double-checked it. You know...measure twice...cut once!
Don't worry about the front of the arm. We tackle that last.
If your arms are like mine, take some pins and stick them in the sofa right under the arm. This will help you gauge how long to cut it (where it meets the floor).
Once again, I marked the outline of the arm and cut 1" bigger.
And then I started pinning.
I had to put a little dart/fold under the arm to smooth out the curve.
And you can see my issue...the frame of my sofa...that little triangle. I took care of that! Thanks for the insight Peaches!
I tucked in some fabric and traced around the frame.
Trimmed...and pinned.
And pinned to the arm piece.
I headed to my sewing machine. In the fifteen or so steps there, I calculated my plan of attack.
And here it is right side out! I did a lot of little bits of clipping around the triangle-shaped insert to get is smooth.
Next...the front of the arms!
Tuesday, July 31, 2012
Slipcover Update: The Frame
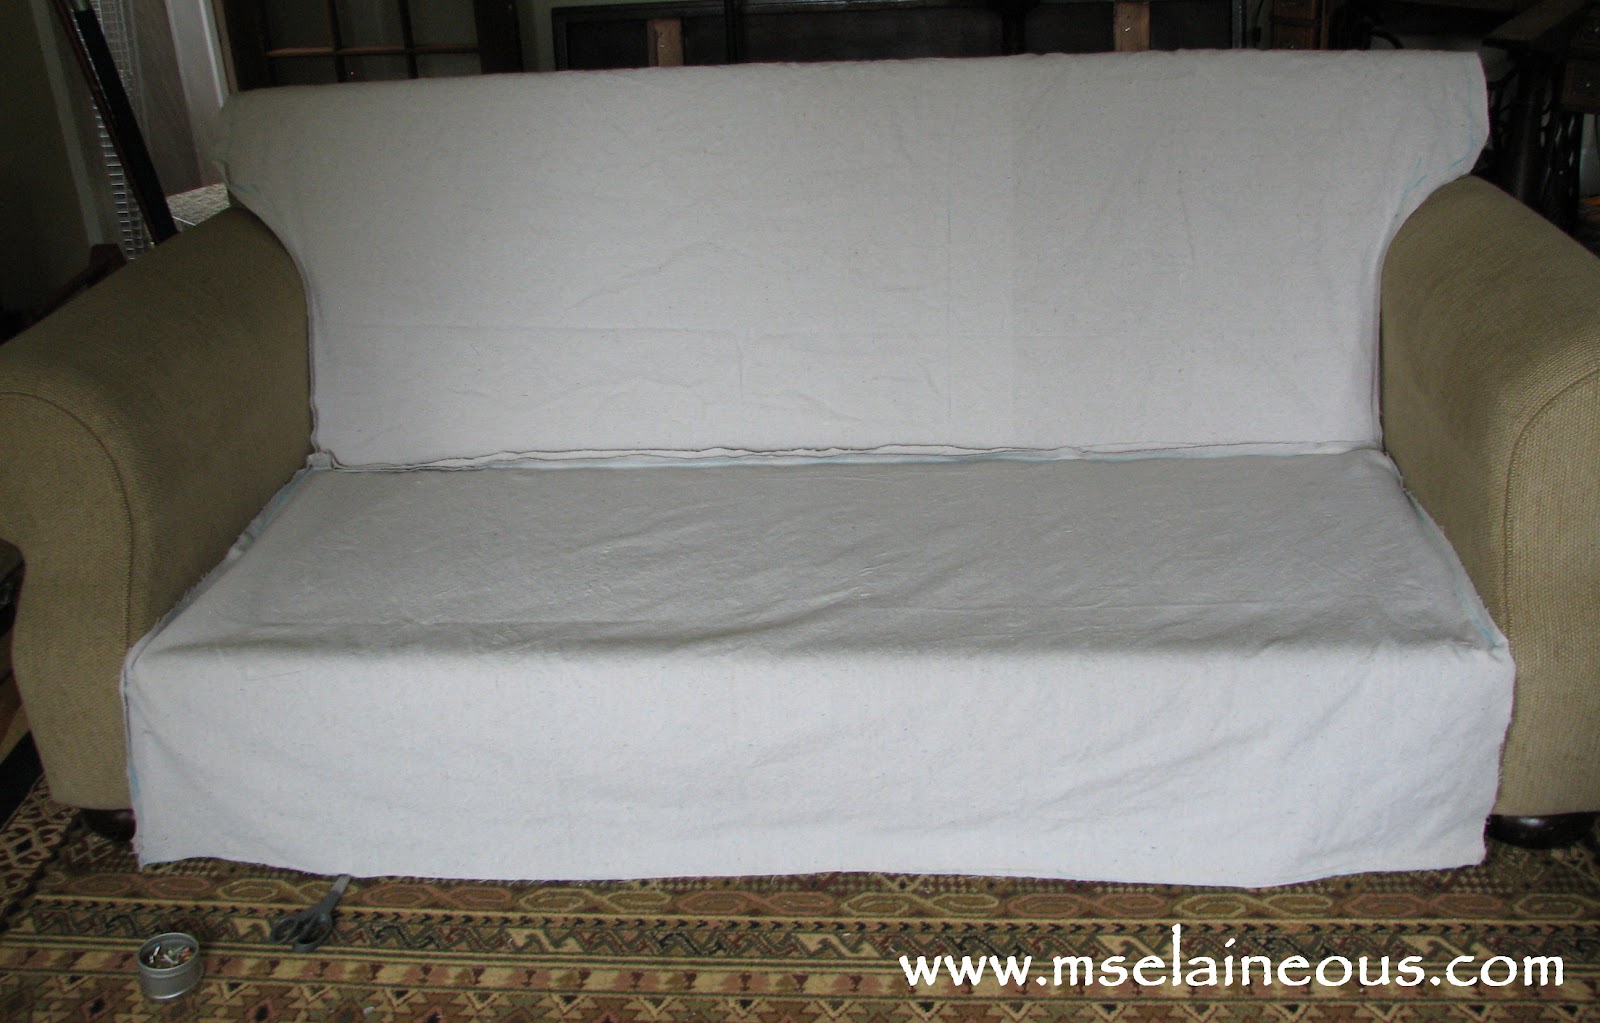
Here's my slipcover update...the sofa frame! I was surprised by how easy this was. This took one drop cloth.
Peaches helped me remove all the cushions. I have a little house, so finding the space wasn't too easy. I had to dismantle a table and put the cushions in the dining room.
And then I vacuumed the frame and the floor. It was clear that I love Lay's Potato Chips and popcorn (and not vacuuming!).
I pressed the edges of the drop cloth (which had curled a bit).
I draped it over the back so it just touched the floor. It went over the frame to the front.
I used a blue fabric marker and traced the outline of the back of the sofa and into the crease in the front (where the seat and the back meet). To do this, I just pressed the fabric flush against the sofa and found the edge with my fingers...and traced.
I cut it about 1" bigger than my mark.
It fit!
I took the other half of the drop cloth (I ripped the huge drop cloth into two pieces and washed/dried them separately).
I flattened it out of the floor. And traced. When I came to the edge that touches the floor, I just held it taut, and ran my maker in the crease - using the floor as my guide.
I cut it about 1" bigger (except for the edge in the front that touches the floor - I cut right on the mark).
And ended up with this. See how the front just touches the floor...
I pinned the back and the seat right on the marks. Then I sewed right on the marks.
Love my Bernina 240. No hesitation whatsoever!
All sewn!
And it is still inside out.
Progess...but still more to go. Next step are the arms! Stay tuned!
Subscribe to:
Posts (Atom)