Pages

 photo Home_zpspchzwjez.png  photo Patterns_zpsffe5v7nd.png  photo Tutorials_zpsplo1y0ea.png  photo 193faa8a-319f-4666-9915-a2cc9af19bda_zpsah1i88qv.png  photo 1aff47d5-9779-4086-ae8c-7c8a885b6c47_zpsyyyqf1xu.png
Showing posts with label Quilting Techniques. Show all posts

Saturday, November 2, 2013

Fall Wall Art - Free Pattern


I designed this Fall Textured Wall Art for Sew Mama Sew, so be sure to head over to their blog to get the free pattern! It's made with Shannon Cuddle and satin, along with some scraps of dupioni silk! And it's really easy to make!


Saturday, February 2, 2013

Crazy Quilt Cutting Options


Some of you have been enjoying my free Crazy Quilt pattern -- it is a lot of fun and requires little skill! I had a reader ask a question about how to cut other blocks, so I thought I would address that.

I typically use a layer cake when I crazy quilt, so all of my fabric is pre-cut and coordinated. But if you decide to make this from a variety of 10" scraps, you will need to do things a little differently. And it's personal preference. You'll need 42 squares and will work in sets of four to five fabric squares. You might want to sort ahead of time (so you don't end up with two left over). 42 squares will net 42, 8.5" finished blocks.

Below I've provided some diagrams of sample cuts for sets of FOUR fabric squares. If you have a set with five fabric squares, you'll need to add one additional cut.


Hope this helps! Have fun but don't go too crazy!

Sunday, December 2, 2012

Star Wars Zippered Bag

title

I was recently catching up on my blog reading and came across this wonderful quilting technique from Elizabeth Hartman (Oh, Fransson!). I want to test it out, so I dug out some Star Wars fabric scraps and went to work. I used the Rosy Wedge Pattern from During Quiet Time.

back
Here’s the back.


Monday, August 6, 2012

Fabric Dyeing


I recently finished up a Surface Design class. It turned out to be more of a basic fabric dyeing class; nonetheless, it was a lot of fun (mainly because several friends were also in it).

Here's a sampling of my final fabric. I had an old sheet that didn't fit my new mattress, so I tore it up and dyed 16" squares. I don't know what I'm going to be doing with them, but I'm leaning toward trying my hand at free-form quilting. I read about it in a book by Rayna Gillman. Too bad my summer is quickly coming to an end and I have to return to work at the end of month!

Monday, July 16, 2012

Color Theory Website

Every once-in-a-while I come across a website that blows me away. It's unusual and inspirational. Today I found one - and it's a gem - Awesome Artists by "Mo" M.C.Gillis

I found it on my daily review of Pinterest. Someone pinned a black and white version of the Color Theory poster and I knew that pinner was on to something. The website is a treasure trove of information and printouts of art and personal wellness. There are booklets galore - some informational and some activities - many designed to help young artists learn about color and design. Take some time to explore. You may run out of ink printing these! Thank you to Mo!!

Friday, March 16, 2012

The Kwik Klip

In the big scheme of things, I'm new to quilting. I've only been at it for a few years. I usually make lap quilts - the largest one was 70" x 70." And my favorite part of quilting is the actual quilting. I got my start quilting purses and L-O-V-E-D free motion. Loved it. It is more difficult on a quilt, but I still don't send my quilts out -- or as my friend refers to it, "Quilt by check." 

The tedious (and often painful) part of quilting is the pinning. That was until one of my sewing students told me about the Kwik Klip. Watch this video to see me pinning my brother's guitar quilt. I usually put a row of pins in, then come back with the Kwik Klip and close the pins. And it works so well that you don't need to lift/stretch the fabric to get the pin closed!


And you can get your Kwik Klip here!

Wednesday, March 7, 2012

Crazy Quilt Block


My first experiment with quilting began in the crazy arena when I saw this technique on a television show. I loved that nothing really needed to line up. For me, it was the perfect place to start my quilting journey.  So here is a simple technique for creating a crazy quilt block. The final block size is 8 1/2".

1. Get Fabric: Start with five different 10" squares of fabric. You can use a layer cake if you'd like. These are just some scraps that I had.


2. Stack: Stack your fabric on top of each other - right side up.


Get ready to cut your fabric; you'll be making one less cut than to the total number of pieces of fabric. So, I have five pieces of fabric and will be making four cuts. If I had four pieces of fabric, I'd make three cuts.


3. Make your first cut - usually somewhere in the middle. Just do it! Don't worry about perfection.


You now have two pieces/sections.


4. Cut again: take one piece and make your second cut. It doesn't need to be exactly like this! 


5. Make your third and fourth cuts.


I made four cuts and end up with five pieces. The five pieces represent the five fabrics you started with.


6. Re-stack the fabric:

     Leave stack 1 alone.

   Take the top piece from stack 2 and place it on the bottom of stack 2.


It should look like this.


7. Stack Again! Take the TOP TWO pieces from stack 3 and place them on the bottom of stack 3.


It will look like this!


8. And Again! Take the top THREE pieces from the next stack and place them on the bottom.


Then take the top FOUR pieces from the next stack and place them on the bottom.


9. Done! You'll end up with five blocks (layers) that are all mixed up. But there is a correct order, so don't start moving them just yet.


10. Separate Layers: Take each layer and separate them into your five blocks. You will have one piece of each fabric in a different spot on each block.

I put a piece of paper under each set so I could easily carry them to my machine to piece. This helps me keep things sorted.


11. Sew Together: 

Sew 1 to 2 and then 2 to 3.


Then sew 4 to 5.


You'll have two parts.


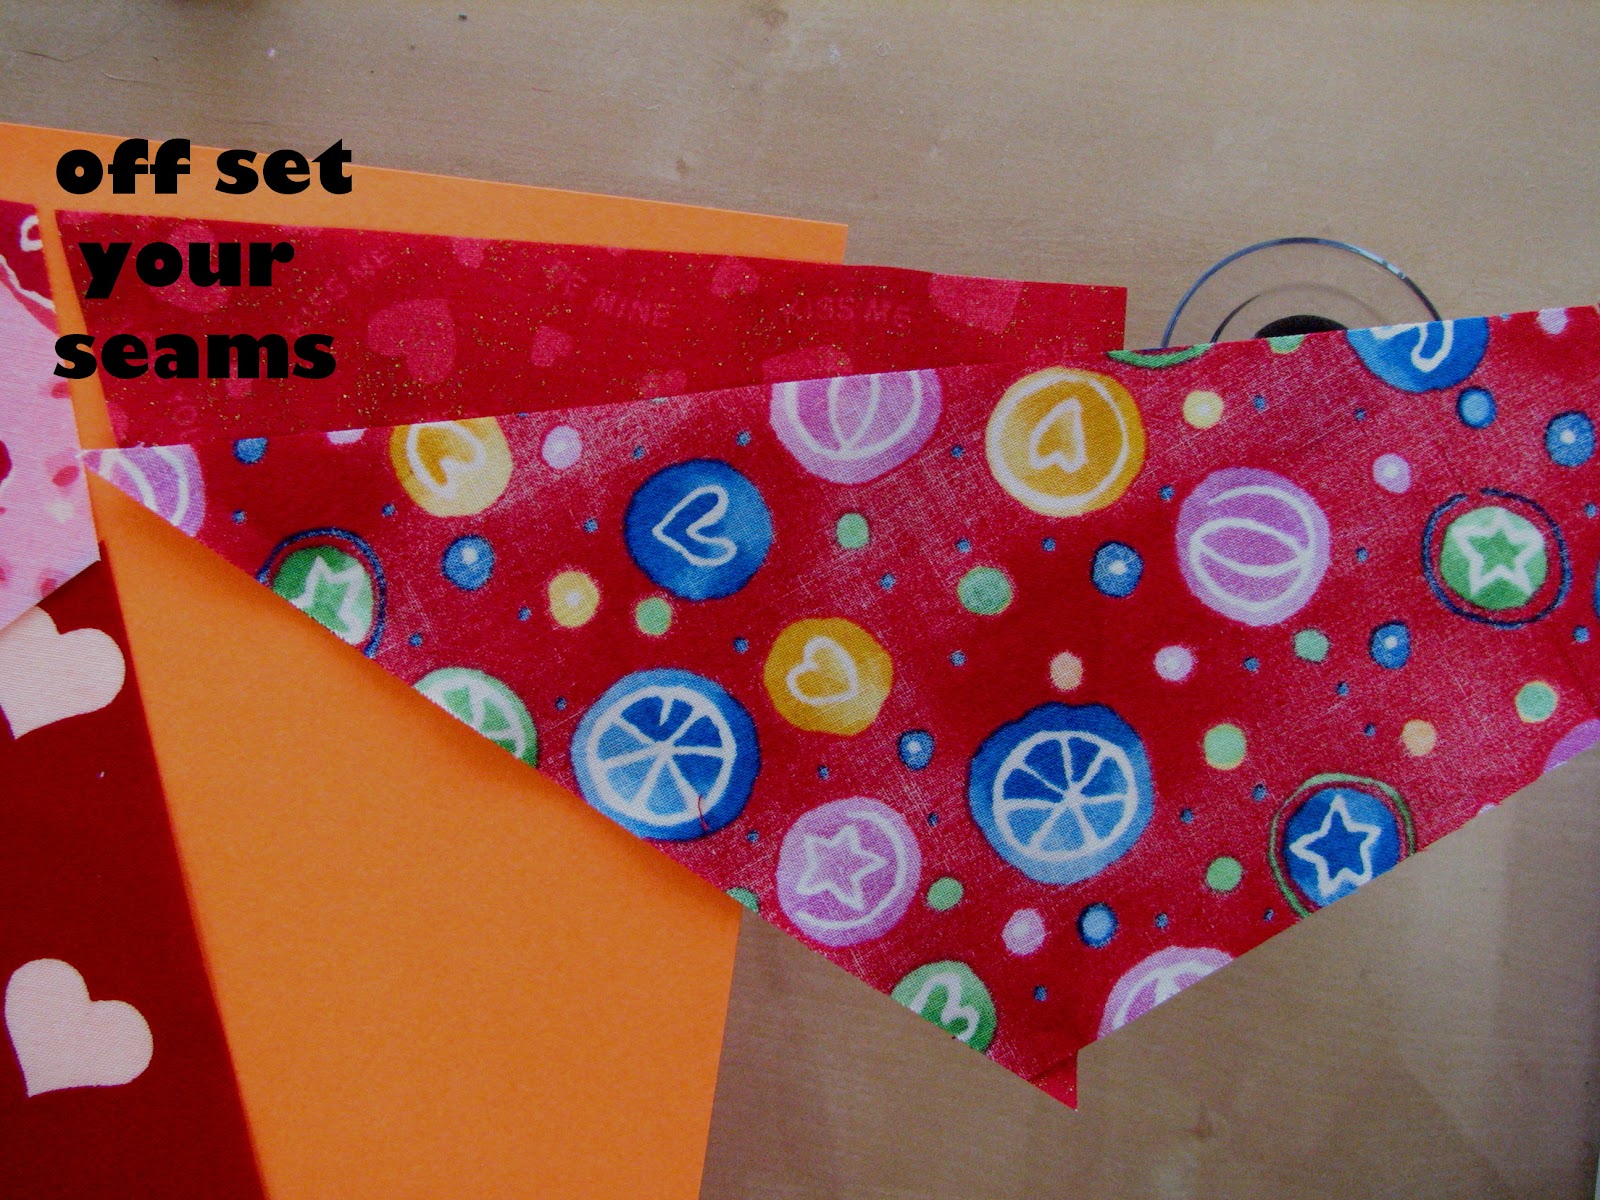
You will want to off-set your seams about 1/4" so the edges of the fabric line up more closely. They won't be perfect.


12. Trim your edges: you'll be sewing this to the 4/5 pieces.


13. Trim your other edge. It should look like this - nice and clean!


And one piece is a little bigger than the other - not a problem.


14. Sew together.


15. Square it up! I used an 8 1/2" square ruler. 


Here it is! All trimmed and ready to go.
And here are the completed blocks.


You can take it from here! You can make a quilt or sew these together, quilt, and make a tote or purse.

In any case, have fun with this technique!


Here is my very first crazy quilt.


Thanks for stopping by! As a gift, here's a free pattern for a round, zippered pouch. It's easy to make...you don't have to cut circles!


UPDATE: I've added some information on other cutting options!


Wednesday, February 8, 2012

Freemotion Lesson: Practicing

Freemotion stitching can be a bit intimidating - I've seen that horrible look of fear when I teach this class. But after multiple lessons and lots feedback, I found something that worked - and took some of the fear away. When you are teaching yourself freemotion:
  1. Make a quilt sandwich out of old fabric or muslin. The sandwich should be about 20" x WOF. One side will be the selvage and the other will be the fold. Tuck the batting in between. Spray with basting spray.
  2. Take a Sharpie and draw lines that are about 1 1/2" to 3" apart.
  3. Remove all the thread (none...nothing in the bobbin, either). This will allow you to focus on the motion part; you won't get worried about the thread tension, the look of your design, the consistency of the length and distance between your stitches. Just play with the movement. 
  4. Make a zig-zag pattern -- start at the bottom right hand side and move from the right line to the left line, then back to the right and so on until you are at the top. Then come back down. And yes, it is often more difficult to push the fabric away from you than it is to pull the fabric toward you.
  5. When you are comfortable with the movement, add thread. You may have to adjust your tension a bit. And you may have to get a different needle (want to learn about needles? Check out the Schmetz Learning Center. If you really have trouble, change thread. Yes, you can try to figure out why that thread doesn't work, but why bother? Just change your thread.
  6. As your comfort level grows, try different designs. Need inspiration? Try the Free Motion Quilting Project! Use the lines to help you focus a bit (look at where you are going...then back at the needle...then where you are going...etc). Go in and out of the lines, so you don't create a path or runway look.
  7. When you are really ready, check out Elizabeth Hartman's tutorial on Free-Motion Quilting.
On a side note, I wear fairly tight rubber-palmed gardening gloves - nothing fancy - that allow me to grip the fabric without much fatigue on my hands. I turn it into a mini-spa by covering my hands in lotion before tucking them into my gloves! 

Also, don't forget to drop your foot! Because of the puffiness of the quilt sandwich, you may THINK your foot is down. If it isn't, you'll have big loopies on the back of your quilt sandwich.

Thursday, January 26, 2012

Cutting and Making Bias Strips

A little baffled by bias binding? This is a great tutorial from Cindy and Jina at Riley Blake Designs. They show you how to fold the fabric to make cutting easier; then you'll get a quick lesson in sewing the strips together!

One thing, though, I don't recommend her ruler placement - I'm a from the school of "put the ruler over the piece you want." So I would use the marks on the ruler to cut the bias strips.


Wednesday, January 25, 2012

Fabric Woes: Puckering

In my Beginning Quilting: The Basics class last night, one of my students was struggling as she sewed two different weights of fabric together - one was stiffer/heavier and one was softer/lighter: the softer one puckered. This resulted in uneven seams and wonky blocks. We put in a new needle, adjusted the tension, slowed down...nothing worked. Then I got out the spray starch. We got the softer fabric pieces out and sprayed (then pressed until dry) and sprayed again. The starch stiffened up the softer fabric so it would feed evenly with the other fabric. VIOLA! Problem solved!

Here is a great article on starching quilt fabric from Generations Quilt Patterns; it includes directions on making your own starch!

Wednesday, January 11, 2012

Plumb Quilts

One of the things I don't see a lot about is a "plumb" quilt. I'm borrowing a term from carpenters (my father is a carpenter), but plumb means exactly vertical or "true." For our purposes, this is a quilt that is even both vertically and horizontally. It's not wonky! When you cut and piece with precision, you get a plumb quilt. 

Figure 1
I first heard about this from my friend Ellen who is an avid quilter and longarmer - she also teaches classes in my studio. She's big into precision - so, yes, she's a pinner. But I learned that it is very difficult for a longarm quilter to quilt a wonky quilt. So as you put your quilt center together and add your borders, be sure to measure (as shown in Figure 1). Average your lengths (vertically, and then horizontally). Your borders will be that average. Pin in the middle then at the ends; as you continue to pin, you may have to work in some extra fabric or every so lightly, pull some fabric to get it to fit.  

In the end, you'll  have a nice, plumb quilt!
Related Posts Plugin for WordPress, Blogger...