I've been a little preoccupied lately with listening to and grading speeches, but I declared this weekend to be my sewing weekend. I spent most of Saturday talking to my family in Michigan who, oddly enough, were without power for almost two days. Yes, Sandy spared me (and I live in NY) but my family who lives 330 miles west of me were not so lucky. It did teach me a lesson - get a gas fireplace!
I managed to squeeze in a little sewing time. I hemmed a pair of dress pants using a blind hemstitch and my Bernina Foot #5. I rarely use this stitch so I had to go online for a tutorial. I found this one at We All Sew. This tutorial will help anyone with any machine brand. The feet are basically the same. The foot is a real gem and it comes with most machines. You might be thinking, "I don't hem." And that's fine, but this foot can be used for more than hemming.
I wrote a previous article about the Edgestitch Foot. You can often use the blind hemstitch foot instead of the edgestitch foot. Recently, I was showing a friend how to sew double-fold bias tape. When she was top stitching the bias tape (the final step) she exclaimed, "I can't sew a straight line!" I looked in her foot collection and found the Janome Adjustable Blind Hem Stitch foot. She attached the foot, made some adjustments, lined up the guide, and sewed a perfectly straight line! So, yes, you might have some feet that are designed for one thing but can be used for other things. I really encourage you to explore your owner's manual and visit the manufacturer's website for tips and directions.
it was wonderful getting back in my sewing room to sew even if it was only to hem a pair of pants. I did manage to set aside some time today go to Ithaca for the first meeting of the local Modern Quilt Guild. I'm hoping for a little inspiration!
If you are interested in making and/or sewing double fold bias tape, head over to my Craftsy Pattern Store for some free tutorials!

Pages


Showing posts with label Feet. Show all posts
Showing posts with label Feet. Show all posts
Sunday, November 4, 2012
Thursday, May 3, 2012
Taking a Quick Break!
 It's that time of the year for me: Final Exams! I've been busy grading and will be wrapping things up next week! YAY! Once I submit grades, I'll be closing my sewing studio and moving my things to my home! This will give me time to work on my own projects and teach classes at the local Bernina dealer (Penn Yan Sewing Machines in Penn Yan, NY).
So today I learned about a really cool foot for my Bernina - the Gathering Foot - #16 - WOW!
I didn't use it to make this ruffled apron, but I will next time! Check it out below!
Tuesday, May 1, 2012
Foot Book: The Zipper Foot!

Woah, May got here a little too quickly! But here is the next chapter of The Foot Book: The Zipper Foot.

I used to be afraid of zippers, then I started playing around and realized that they aren't that difficult to figure out. So make a sample page using whatever zipper technique you like!

Here I am adding my zipper to my fabric.

Almost done!
And here is the final page! Nothing fancy - I edged the page with embroidery floss just to finish it off. Be sure to read my articles about zippers! Just follow the link to the right.
I put a clear pocket on the back of each page for my notes. Next month I'll write about that process!
Monday, April 2, 2012
Foot Book: The Button Hole Foot

The first foot we tried out was the Buttonhole Foot. It's that one foot that you look at then put away because it's a bit of a mystery. But once you get over the fear, a buttonhole foot is actually quite easy to work with.
 |
| Husqvarna Viking Foot |
Each machine is a bit different, so get out your manual and read about the foot. The instructions will tell you how the foot works.
We played a bit before we made our actual pages. We made a sandwich with some tear-away stabilizer (you'll find it in the notions section - it's found in rolls and is made for machine embroidery).
 |
| Janome Foot |
We experimented with corded buttonholes. The smell of fear was in the air, but once we got going, everyone really enjoyed it!

Here is my Foot Book page. I numbered all my samples - I printed the page titles and numbers on fabric sheets.
The flaps open and close. I could have gotten really fancy and sewed the buttons on with a button foot, but I don't own one!
One of my buttonhole buddies put a clear pocket behind the button flaps, so when she unbuttoned it, there was a vinyl pocket where she slipped a note card with notes. Genius.
Thursday, March 1, 2012
Foot Book Club: Creating the Cover
It's time for you to start exploring the feet that come with your machine. And what better way than to create a Foot Book. A Foot Book is a book that has pages dedicated to particular feet. You'll test out feet, stitch up some samples demonstrating techniques, then sew those into your pages. The final size is about 9" x 9" (or so...it doesn't really matter - mine is about 8 1/2" because I cut it too small!)

Here is a Foot Book cover, complete with grommets and rings, made by one of my Foot Book Club members. The cover was pieced; the words "Foot Book" were created from a die cutter and fused on. She made a quilt sandwich, did a little freemotion stitching, and finally used a couching foot to stitch on some embroidery floss.
Once she was happy with the design, she cut it down to size and added a faux piped binding. For the back cover, she made a pieced block, made a quilt sandwich, did some decorative stitching, and added binding. The last step was to add the grommets and book rings. She's now ready to add her sample pages!
Want to follow along? Periodically, I'll write about what we do in our Club meetings. I'll include some pictures and directions. So today it's all about the cover. Time to get creative!

1. Gather Supplies:
- Batting (this is 6oz batting - it's very fluffy! but makes for a nice cover because it will be stiffer). Grab whatever batting you have. Doesn't matter much. Cut it to about 10" square.
- Scraps of Fabric - this will be to piece your cover and to create whatever you want on the cover. If you don't want to piece it, use one piece of fabric. You'll also need binding fabric.
- Fusible Web - I used Heat 'n Bond Lite.
- A Die Cutter with Letters - to create the words "Foot Book" OK, you probably don't have one, you have some options.
- 1) Make a design on your computer and print it on fabric. I've used Dritz Printed Treasures.
- 2) Find a scrapbooking store where you can rent a die cutter (our local shop charges $5).
- 3) go to my Craftsy Pattern Shop and download my FREE FOOT BOOK cover. Print and trace onto fusible web; then fuse to fabric and cut out your letters! VIOLA! (If you don't quite get how to applique, please review this tutorial at Skip To My Lou - she even has some BIG letters that you can download!).
- 2" Book Rings - I got mine at Staples. They were in with the file folder stickers.
- Grommets and Pliers - I purchased the pliers and large grommets/eyelets at JoAnn Fabrics. You can get the Large or XLarge. The pliers only work for the Large. You'll need a hammer and the tool for the XLarge.
- OPTIONAL: Embroidery floss and a couching/cording foot. Don't know what a couching/cording foot is? Learn more here....

2. Piece Your Cover:
Using the fabric of your choice, piece your cover. The final size should be about 10" x 10". After you have quilted this, you'll cut it down to the final size of 9" x 9".

3. Create "FOOT BOOK":
I used a Sizzix Die Cutter to do this. 
4. Make Quilt Sandwich:
I took my batting and sandwiched it between my cover and a piece of fabric (in pink) that will be the inside of my cover.
You may want to use some quilt basting spray to hold this together.
I wish I would have made my letters in plain fabric so they would have shown up better. Oh well!


5. Quilt as Desired:
I just sewed random straight stitches using my walking foot.
I increased my stitch length to a 3 to give it more of a topstitching look.
Once I was done, I cut it down to size: 9" x 9".

6. Add Binding:
I pieced the binding and attached it. My only problem was that the seams met up with the corners; this added some bulk and made turning the corners a bit difficult.
I use a sharp pair of curved scissors to hold the binding as I sewed it. You can also use a stiletto.

Front View

7. Add Eyelets/Grommets:
I marked the back of my cover.

Cut the hole.
Insert the longer eyelet through the front.
Insert the stubby eyelet on the back - right over the stem of the eyelet.

Follow the directions and squeeze the pliers!

Done!
And you can see the bulky corner from the seam I created when I sewed the two pieces of binding fabric together.

Final Foot Book with Binder Rings!
When the mood strikes, I'll be adding pages. So check out "Foot Book Club" in the right column for more pages!
Tuesday, February 28, 2012
Zippers in Pillows and Cushions


First, go to my Craftsy Pattern Store and download the free tutorial: How to Insert a Zipper in a Pillow.


Flip the fabric to the wrong side. Along the right edge of the fabric, mark 1 1/2" from each end.
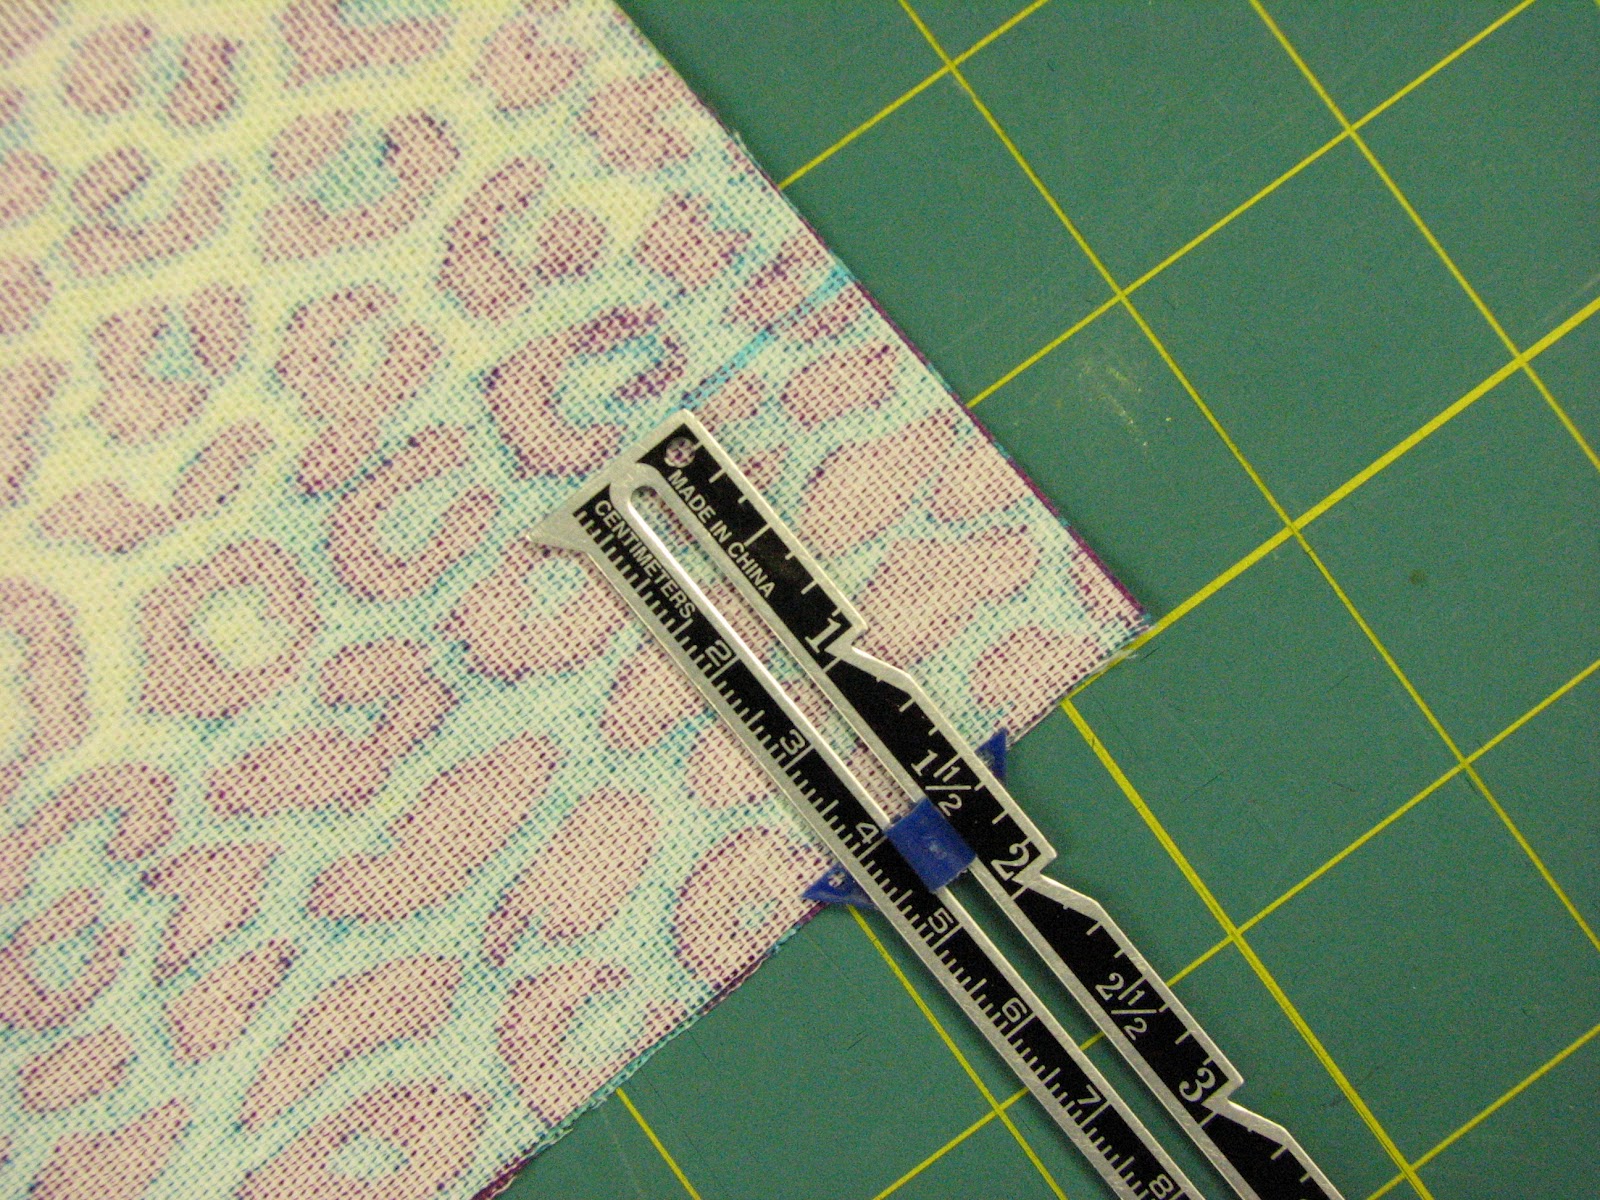 Mark at bottom end.
Take your other piece of pillow fabric and place them right sides together (RST) and head to your machine. Make sure the edges are lined up and the pieces are even and directly on top of each other.
 Using a 1/2" seam allowance, sew from the end to your 1 1/2" mark. Stop and backstitch. LEAVE IN YOUR MACHINE...then
...change to a basting stitch and continue sewing to your next mark, then stop, backstitch, and switch back to a regular stitch length. Sew to the end (and backstitch).
 The area between your marks should be a basting stitch. You are basting because this is where the zipper will go. You will be ripping out the basting stitches in the very last step!
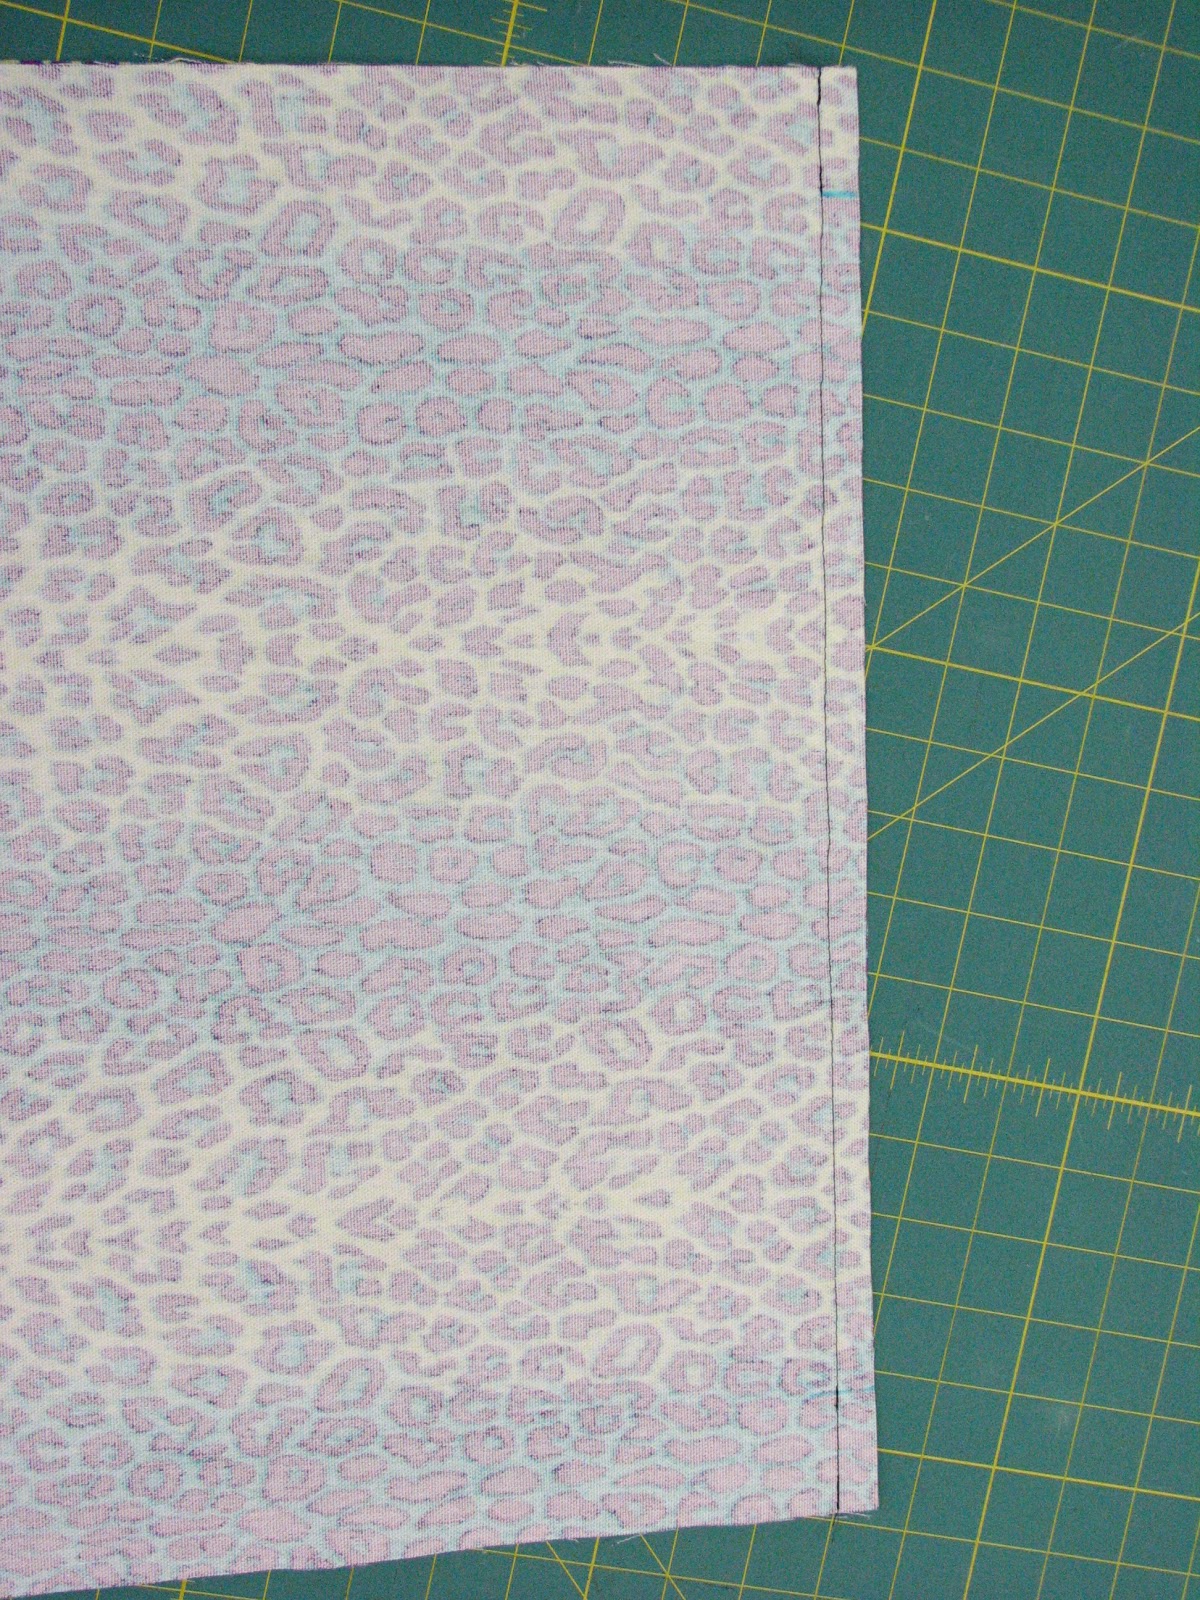
 Press seam open. Make sure that you can see you 1 1/2" marks. If you can't, remark. You'll need these for the next step.

Find your mark (you'll see mine in blue). Starting there, rip out about 2" of your basting stitches. This is where your zipper pull will go and doing this will help you work around your zipper pull.
Head to your machine. The bobbin thread will show on the outside of the pillow, so make sure it matches your fabric.
Put on your zipper foot.
 My zipper is 24" (I got if from Zipperstop on eBay!). So it is too long. I usually use a zipper that's too long - I cut what's left over.
Place the zipper pull in the area you ripped out. You'll see that the top of the zipper pull is right at my blue 1 1/2" mark.
Go get some Scotch tape.
 Center the zipper over the seam.
 Tape the zipper down, just once, to hold it in place. You are going to start sewing at the other end; this stops it from moving.
And it was a very sunny day out! Highly unusual in New York in February! I did get outside for a walk later!
 Starting at the other end, on your 1 1/2" mark, sew across your zipper. You can start just a tad bit before the teeth. And yes, sew right over it.
Don't backstitch - it looks ugly! This zipper doesn't take a lot of abuse, so it doesn't need to be super strong at the ends.
 When you are just past the teeth, put your needle down, lift your foot, and pivot. I lined up the side of my foot with the edge of the zipper. My needle is all the way to the left.
You will have to play around and figure out what works for your particular foot.
You can now remove the tape.
 Sew an inch or so, stop, check the zipper placement, and sew some more.

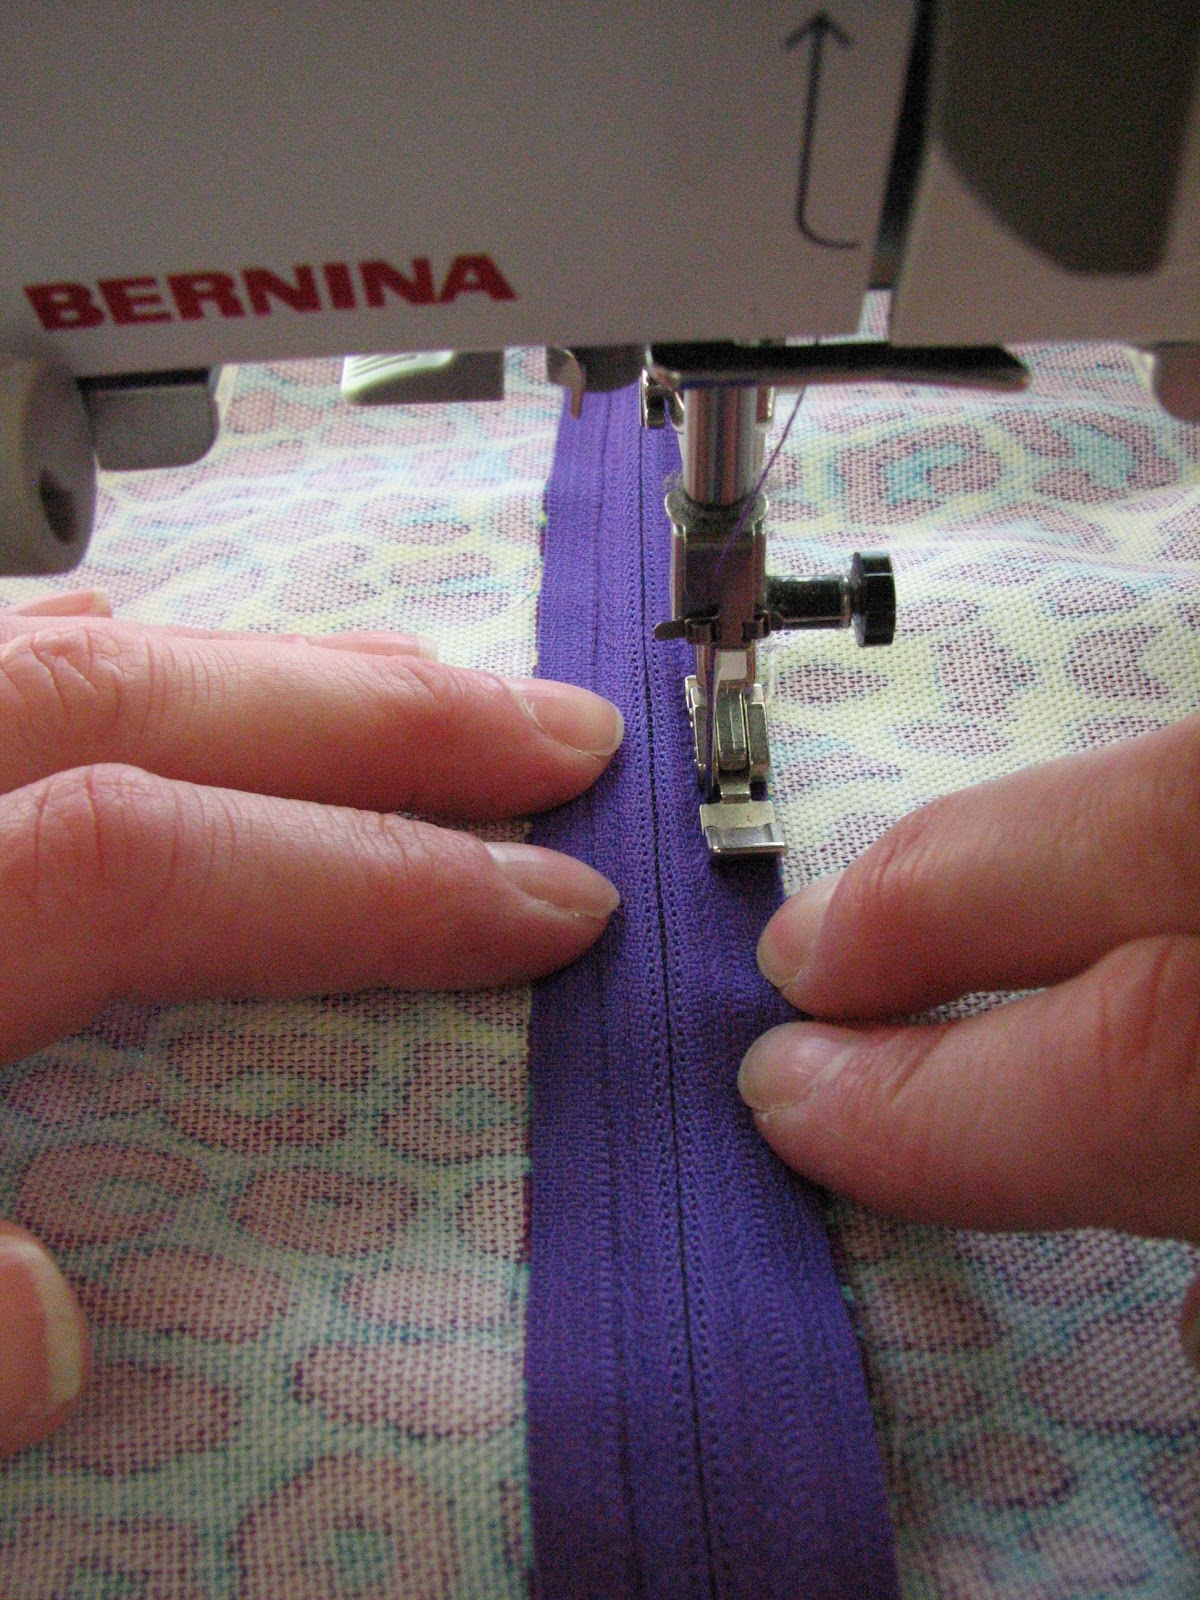
I just kept my zipper foot lined up with the edge of the zipper and used the pressure of my fingers to hold the zipper in place. Sew...and sew..
If you struggle with this, get out more tape. I've used 1/4" double sided Wonder Tape and taped it to the LEFT side of the zipper - that held it in place while I sewed the right side. I then removed it -- you can't sew over that tape!
 You'll end up near the zipper pull. You'll want to stop when you are about 1" in front of it.
Put your needle down and lift your foot.
 Poke the zipper pull through the area (basting stitches) that you ripped out.
Pull the zipper pull so it is behind the foot. Make sure your needle is down!!
 Straighten the zipper, put your foot down, and continue sewing to your 1 1/2" mark.
When your needle is lined up with the 1 1/2" mark, stop, put your needle down and lift your foot.
Pivot and get ready to sew across your zipper.
 Using your fingers, pinch the zipper together and sew across the zipper. No need to backstitch! You really want to limit your backstitching - it looks ugly!
And yes, taking that picture was tricky! I had to use the timer and put it on a fabric bowl to keep the camera from shifting!
 When you are a stitch or so past the teeth, put the needle down, lift the foot and pivot.
 Then continue sewing, until you are at the zipper pull. Stop and put the needle down.
 From under the fabric, reach in and grab the zipper pull. Lift the foot and pull the zipper tab back behind the foot. The zipper should now be closed.
 Put the foot down and continue sewing.
 Here I am using my fingers to hold the zipper in place. No pins. I hate pins! Just go slowly. And yes, I do think about sewing my left fingers into my zipper. They do get close to the needle!
This side should be easier because it's held in place by your stitches.
 When your needle touches your 1 1/2" mark, stop and put your needle down.
Lift your foot and pivot.
 Sew across your zipper and STOP when you are just past the teeth and your needle is at the point where you pivoted (when you started).
You don't want to sew past your stitches - it starts to look ugly.
 Take your fabric out of your machine and turn it over! YAY!
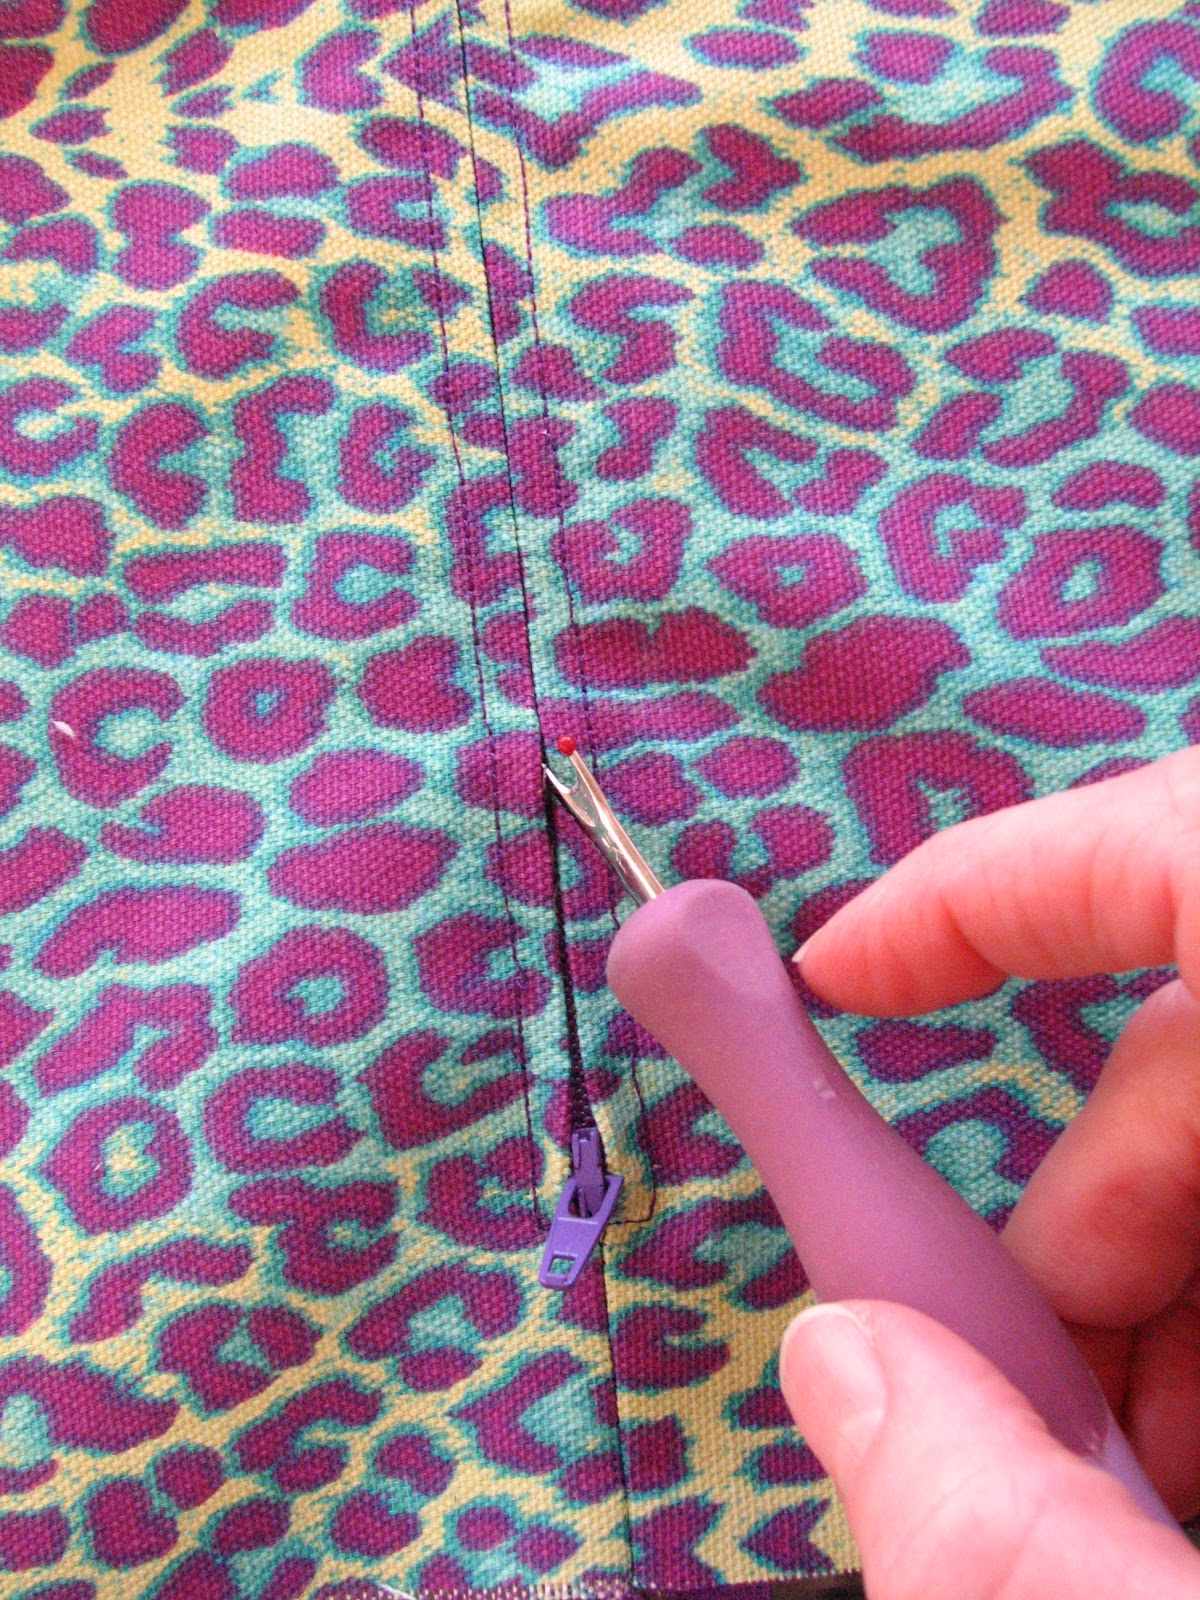
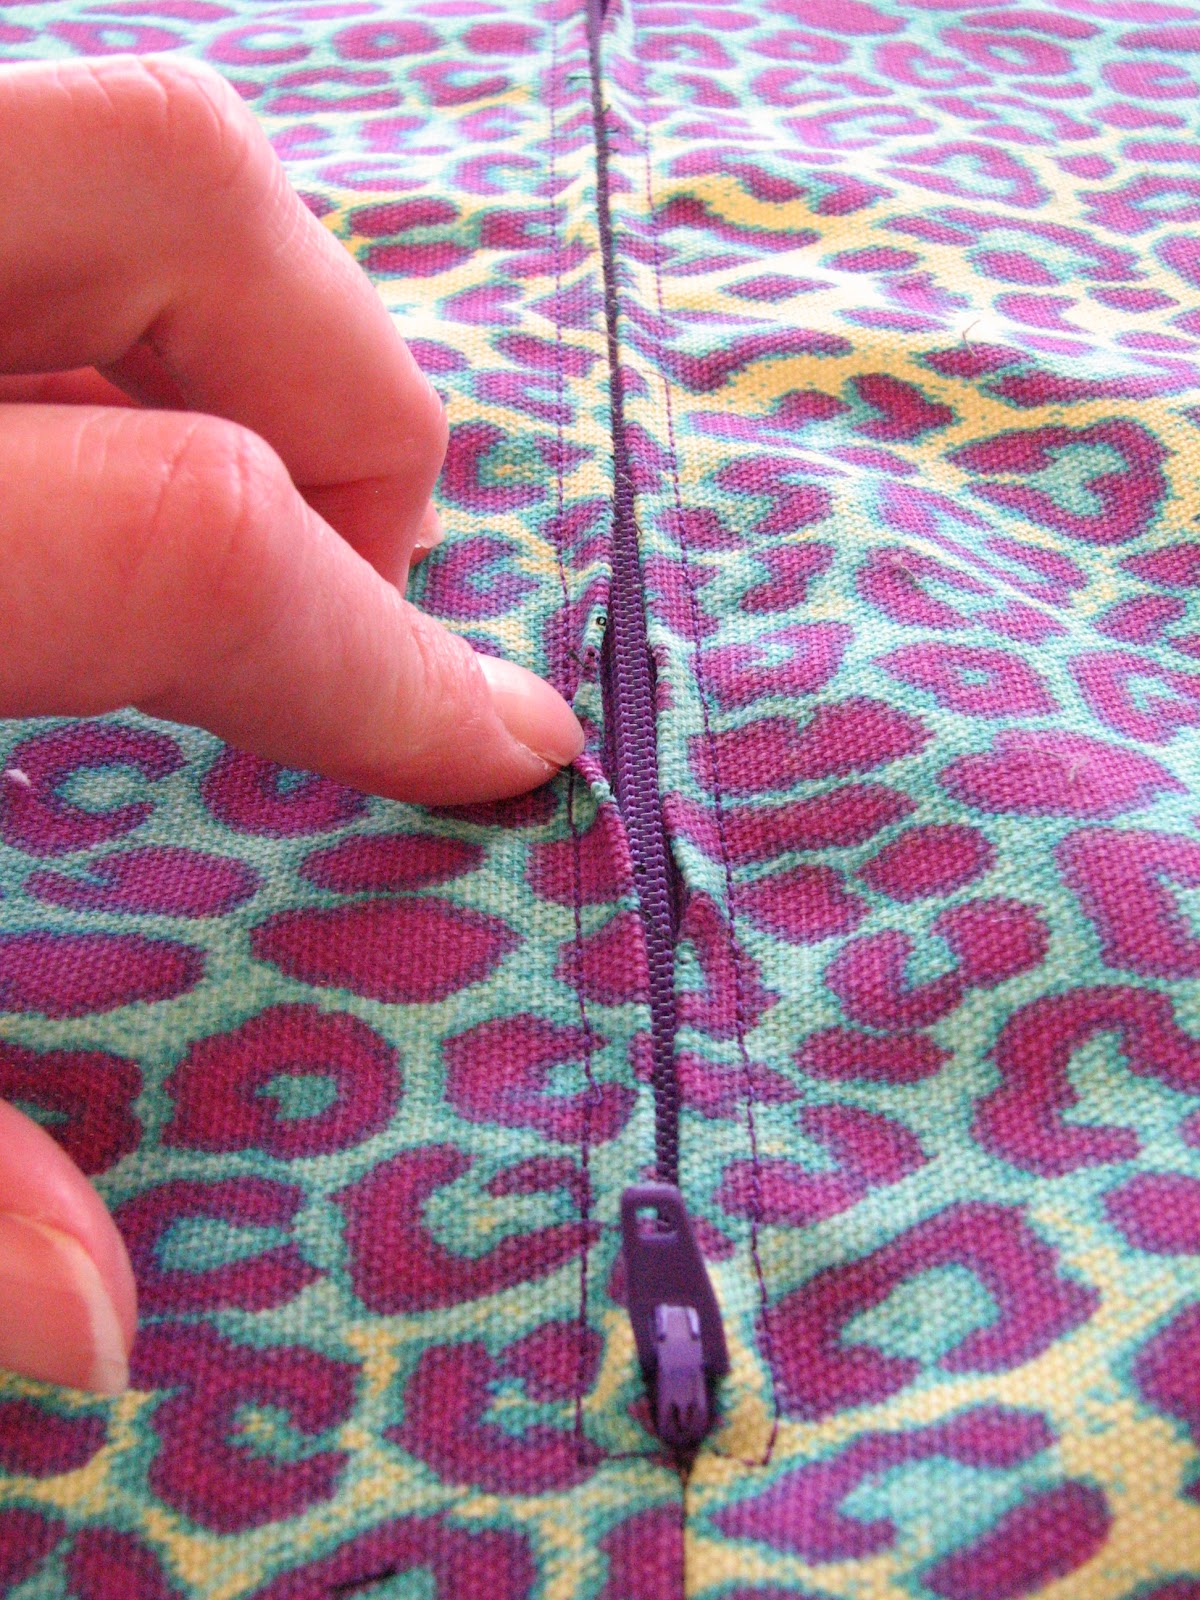
 Take your seam ripper and carefully rip out your basting stitches.
Pick away at the ripped threads to reveal....
 ...your zipper!
To finish your pillow, cut your excess zipper off (leaving about 1/2") and OPEN your zipper about half way. You'll be mad if you don't!
 Then sew around your pillow, using a 1/2" seam allowance. Make sure you backstitch at the corners. This seam will take some abuse, so you need to reinforce it.
Here's a picture from my blog entry about backstitching.
 Clip your corners (this is why you backstitch).
Open your zipper all the way and pull your pillow through your zipper. Poke out your corners.
Carefully insert your pillow form.
 Here's a cute pillow I made for Father's Day. The zipper is at the bottom. And that's some awesome hockey fabric! Can you tell that I'm from Michigan!? My dad used to take me to Port Huron Flags games when I was a kid.

...change to a basting stitch and continue sewing to your next mark, then stop, backstitch, and switch back to a regular stitch length. Sew to the end (and backstitch).


Find your mark (you'll see mine in blue). Starting there, rip out about 2" of your basting stitches. This is where your zipper pull will go and doing this will help you work around your zipper pull.
Head to your machine. The bobbin thread will show on the outside of the pillow, so make sure it matches your fabric.
Put on your zipper foot.

Place the zipper pull in the area you ripped out. You'll see that the top of the zipper pull is right at my blue 1 1/2" mark.
Go get some Scotch tape.


And it was a very sunny day out! Highly unusual in New York in February! I did get outside for a walk later!

Don't backstitch - it looks ugly! This zipper doesn't take a lot of abuse, so it doesn't need to be super strong at the ends.

You will have to play around and figure out what works for your particular foot.
You can now remove the tape.


I just kept my zipper foot lined up with the edge of the zipper and used the pressure of my fingers to hold the zipper in place. Sew...and sew..
If you struggle with this, get out more tape. I've used 1/4" double sided Wonder Tape and taped it to the LEFT side of the zipper - that held it in place while I sewed the right side. I then removed it -- you can't sew over that tape!

Put your needle down and lift your foot.

Pull the zipper pull so it is behind the foot. Make sure your needle is down!!

When your needle is lined up with the 1 1/2" mark, stop, put your needle down and lift your foot.
Pivot and get ready to sew across your zipper.

And yes, taking that picture was tricky! I had to use the timer and put it on a fabric bowl to keep the camera from shifting!

 Then continue sewing, until you are at the zipper pull. Stop and put the needle down.

This side should be easier because it's held in place by your stitches.

Lift your foot and pivot.

You don't want to sew past your stitches - it starts to look ugly.

Pick away at the ripped threads to reveal....
To finish your pillow, cut your excess zipper off (leaving about 1/2") and OPEN your zipper about half way. You'll be mad if you don't!
 Then sew around your pillow, using a 1/2" seam allowance. Make sure you backstitch at the corners. This seam will take some abuse, so you need to reinforce it.
Here's a picture from my blog entry about backstitching.

Open your zipper all the way and pull your pillow through your zipper. Poke out your corners.
Carefully insert your pillow form.
Subscribe to:
Posts (Atom)