I insert a lot of eyelets and grommets into my project using the Dritz Eyelet Plier Kit. And every. single. time, I have to get out the directions. At first, I copied the back of the package and laminated it. I put that into my little "grommet/eyelet" basket were I kept them. Even so, I'd read and re-read out of fear that I'd do it incorrectly.
The other day I was adding some eyelets to a hanging shoe organizer that I cut up so it would fit going down my stairs. And it finally hit me: write on the pliers (Deep Half goes on the Right Side - Shallow Half goes on the Wrong Side).
BTW, I love my label-maker, too.
Showing posts with label Notions. Show all posts
Tuesday, August 11, 2015
Friday, July 24, 2015
Cord Taco Free Sewing Pattern
Corral those earbud and cords with this cord taco! It's really easy to make because it involves very little sewing!
SUPPLIES:
2 - 4" squares of fabric
1 - 4" square of Heat n' Bond Lite
1 - Size 16 snap
It helps if you have an overlock/cast foot. You'll be using an overcast stitch and this foot is designed to help with that (it has a pin that supports the stitch as it "overcasts" the edge of the fabric).
Here we go...
1. Cut your 4" squares of fabric and Heat 'N Bond Lite.
2. Following manufacturer's directions, fuse two pieces of fabric together (wrong sides together!).
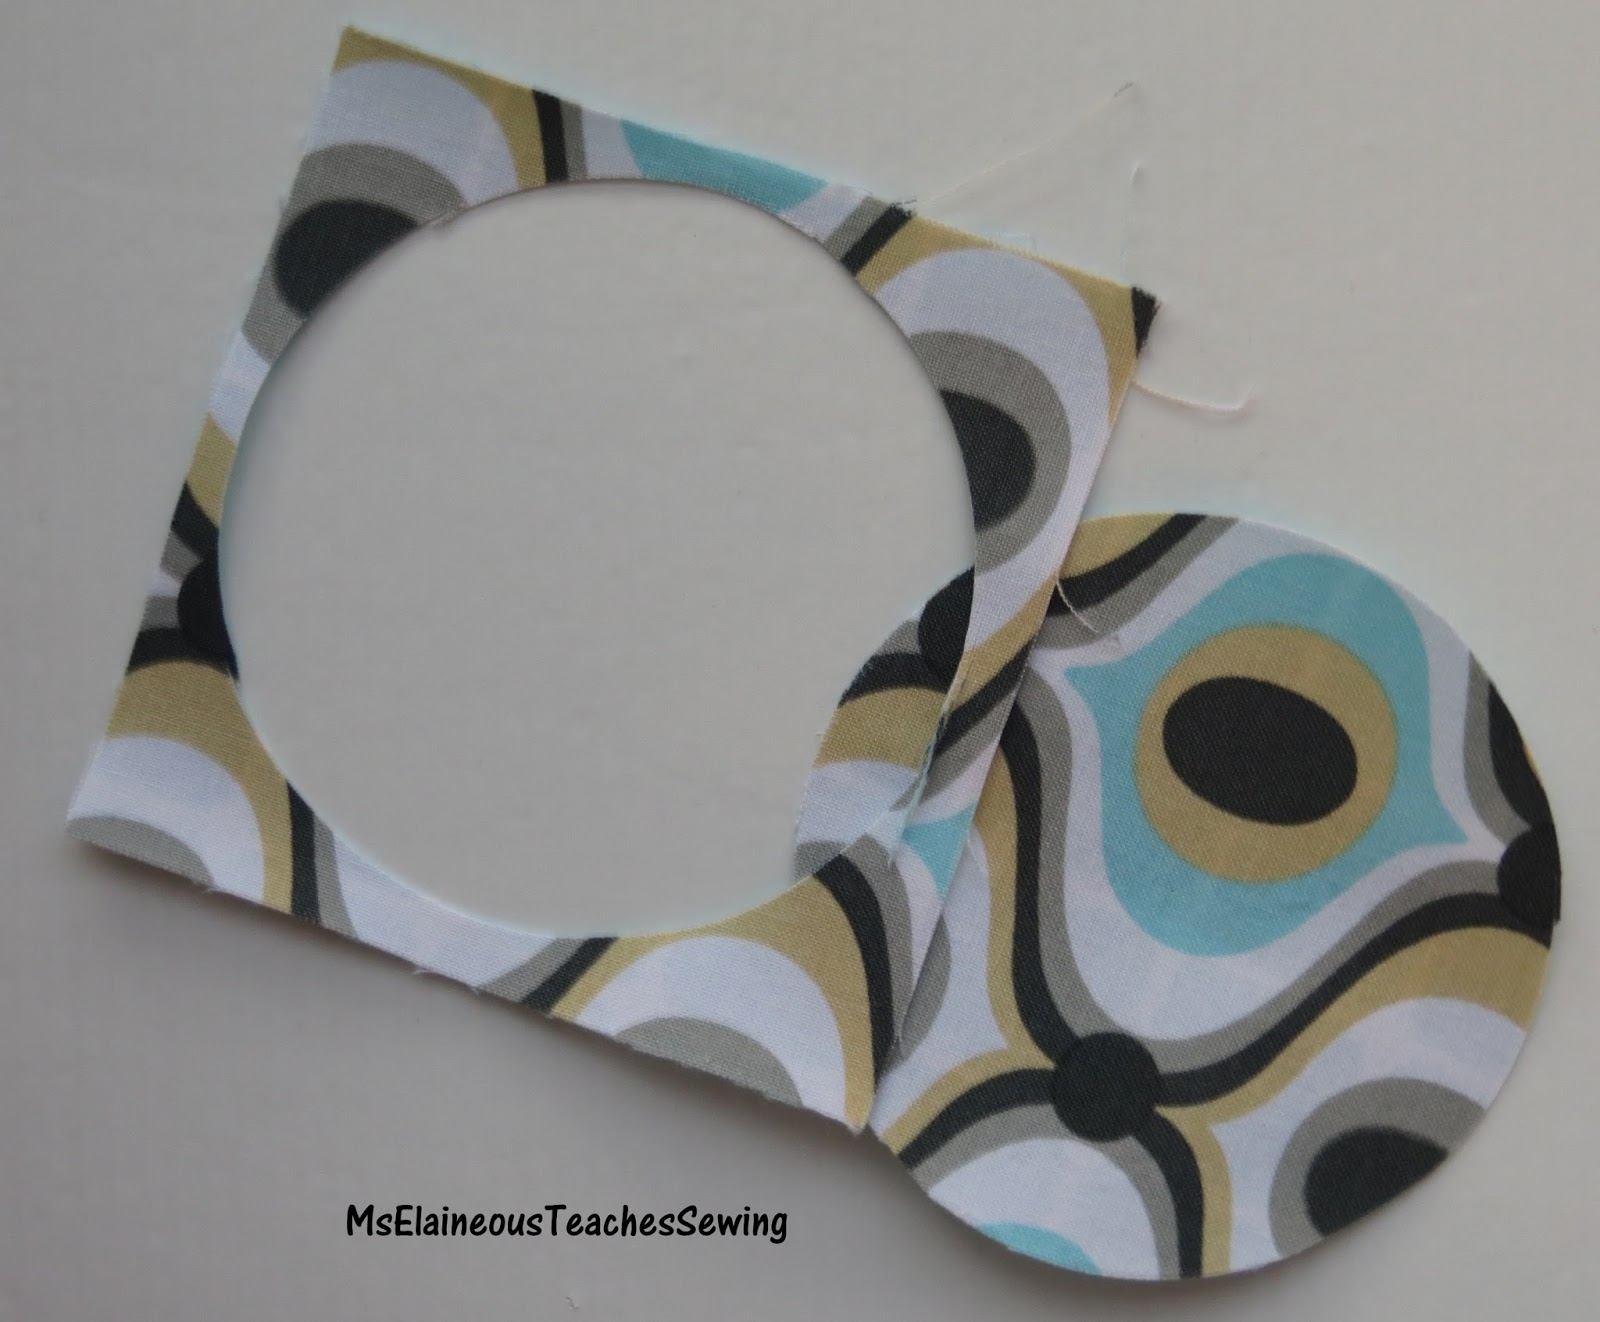
3. Cut out a 3 1/2" circle.
I use this Olfa circle rotary cutter. You could also use a compass to draw a circle, then cut out with scissors.
4. Using a zig-zag or overcast stitch, sew around the outside of the circle. I made my stitches close together and went around twice. This allowed the thread to fill in nicely.
And here's what it looks like!
5. On the inside of your taco, mark mid points as shown (1 3/4"). You only need one. I have no idea why I drew both!
6. On one line, mark 3/8" down from the edge.
7. Transfer those dots to the outside fabric. I just held the circle up to the window so I could see the dots and marked the other side.
The inside will look like this. Use the dots to make sure that your snaps are in the right spot!
9. Attach your snaps. I use this SnapSetter. I love it. Love. I could never get pliers to work.
Here it is!
Corral those earbuds and snap it together!
Thanks for reading! Here's a bonus pattern for a free zippered coin purse!
Labels:
Bags and Purses,
free pattern,
Notions,
Sewing Projects,
Teacher Gifts
Monday, July 20, 2015
Hand-Crafted Seam Ripper!
My friend Anna dropped by yesterday to pick up some zippers and hardware (to make her Bandolier Bag!) and gave me one of these beautiful seam rippers. Her uncle makes them and sells them in his Etsy store (SnowFlakeBowls) - along with some other items like bowls and pens. What a great gift! So I thought I'd share it with you.
I think these would be great to give to someone who is new to sewing. Why? A seam ripper?? I think those who are new to sewing often expect perfection. Or at least they think that those of us who've been sewing awhile are "perfect." They don't realize that even the experts mess up. It's all about experimenting and being comfortable making mistakes and seeing it as an opportunity to learn. I have several seam rippers scattered around my sewing room - and they all get used. But this one will remind me that ripping seams out is a beautiful thing!
Sunday, October 5, 2014
Nifty Notion: Dritz Ezy-Hem
I posted this a while back but think it's worth a repost. I taught a sewing class yesterday and used the Dritz EZY-Hem. All five women where amazed by how functional it is!
I'm not a clothing maker, so after I purchased this Ezy-Hem, I began to wonder about my shopping skills. It sat for a few years, but I recently realized what a gem it really is.
In a matter of minutes, they had accurate 1/2" seams. The markings on the other side allow for even more hem sizes. It's a nifty notion!
I'm not a clothing maker, so after I purchased this Ezy-Hem, I began to wonder about my shopping skills. It sat for a few years, but I recently realized what a gem it really is.
The Ezy-Hem makes it "ezy" to measure, iron and, therefore, create hems. When my students were making teepees, they needed 1/2" seams - so we headed to the ironing board with this notion and a hot iron.
Tuesday, June 11, 2013
The Point of Needles
When I first started sewing, I didn't pay attention to my machine needles. And given my conversations with other beginners, I realized that this isn't all that unusual. However, it didn't take long for me to see the error of my ways. When I took my very first sewing machine (a refurbished 1967 Singer Touch & Sew) in for a quick repair, I left with a fixed machine and a new appreciation for needles.
Since that time (so very long ago), I've use Schmetz needles and only Schmetz needles - and not just because that's what the repair shop recommended. I can see the difference!
I keep a slew of them in my needle storage box.
My embroidery machine needles have a different home in a different box!
![]() |
| An old pill bottle stores my used needles. |
![]() |
| Stored on my floor lamp post next to my machine! |
I really recommend visiting the SchmetzNeedles website. I love their Learning Center, especially their Trouble Shooting Guide. It might be a little overwhelming at first, but, as with anything, troubleshooting gets easier with experience.
And just how much do I love needles? Enough that I buy my Universal 80/12 by the box!
And, BTW, I'm in no way affiliated with Schmetz. I just know a good thing when I use it!
Thursday, January 3, 2013
Sew Bad: 13 Sewing Habits That You Need to Break
Tuesday, July 10, 2012
My New Favorite Interfacing!
I usually keep different types of interfacing on hand at all times. I am picky about what I use - I prefer fusible horsehair (ACRO) in totebags because it's woven and strong. I use fusible fleece in little bags because it adds shape. And I use a lightweight fusible in lots of projects just to give the fabric some strength.
A few months ago I learned about a new type of stabilizer called Soft and Stable by Annie. It was a thin foam-based stabilizer. I loved to work with it because it added shape without adding bulk. And it was a breeze to sew through (unlike fusible fleece). The only drawback was the cost: $11.95 for an 18" x 58" package. Yikes.
So I started to explore some alternatives - I knew I had seen something similar to this foam stuff at JoAnn Fabrics. After some research online, I found it: 1/4" scrimback sew foam. It's not quite the same, but (60" wide) it's considerably cheaper...so who cares!
I decided to head to JoAnn to see if I could find it. And I did. It's over in the upholstery fabric section. In the store near me, it comes in tan and gray. And just like everyone else, I used my coupon (and Teacher's Rewards) and got it for a lot less than $14.99 a yard.
Here is a tote bag I just finished for a friend of mine. It is standing on it's own - I'm just holding the straps up!
And here's a diaper bag I made using the Soft and Stable. I love the shape that the stabilizer gives the bag. Awesome!
I'm not sure if I would use it for all bags, but it's worth a try! The only directions for using this is to place the foam against the fabric and the scrim to the outside. The scrim prevents your stitches from tearing the foam.
UPDATE! I've got a treat for you. Here's a free pattern for a round zippered pouch...but you don't have to cut anything round! Yippee! I was inspired by this free heart-shaped machine embroidery design.
Monday, April 16, 2012
Today's Project: The Burlap Bag Part 1
I've had this rice bag hanging around my studio for a few years. I loved the graphic but really didn't know what to do with it. I've seen quite a few tote bags made with burlap bags - mostly with coffee bean bags. Call be a tender-skinned gal, but whenever I saw these the only word that came to mind was "chafe." Let's face it, burlap is really rough.
So I decided to test out one of my favorite products: Heat 'N Bond Iron-On- Vinyl. The only way I could figure out how to soften the burlap was to cover it, so I cut the bag and fused the vinyl to the burlap. And it worked.
It's a bit crinkly sounding and sometimes I wonder if the vinyl is really fused on, but right now it looks good. Before I did anything, I fused some lightweight interfacing on the burlap (which I cut bigger than what I needed). I also cut the vinyl too big.
The back of the tote is plain denim. It's big - about 20" x 17" - so I sewed in a 3" gusset to add depth.
Friday, April 13, 2012
The Tube Turner
| Ring holder on a Jewelry Roll. |
One of my favorite sewing gadgets is this Turn-It-All. It makes turning and stuffing tubes really easy. I recently used it to make a ring holder for a jewelry roll.
1. Sew your tube and clip the corners.
2. Insert the correct-sized tube (there are three tubes that come with the Turn-It-All) into the open end of your project.
3. Insert the dowel into the other/sewn end your project. You'll be poking the tip of the dowel into the open end of the tube.
4. Push the dowel into the fabric/tube. You're project will be inside the tube, so push it all the way out. You are done!
5. If you'd like to stuff it, just put the tube inside your project, cram in some stuffing, and use the dowel to push it in. You'll have to keep moving the tube up so the stuffing goes into your project and doesn't get stuck in the tube.
Friday, March 16, 2012
The Kwik Klip
In the big scheme of things, I'm new to quilting. I've only been at it for a few years. I usually make lap quilts - the largest one was 70" x 70." And my favorite part of quilting is the actual quilting. I got my start quilting purses and L-O-V-E-D free motion. Loved it. It is more difficult on a quilt, but I still don't send my quilts out -- or as my friend refers to it, "Quilt by check."
The tedious (and often painful) part of quilting is the pinning. That was until one of my sewing students told me about the Kwik Klip. Watch this video to see me pinning my brother's guitar quilt. I usually put a row of pins in, then come back with the Kwik Klip and close the pins. And it works so well that you don't need to lift/stretch the fabric to get the pin closed!
And you can get your Kwik Klip here!
Friday, March 9, 2012
It's Best to Press!
Whenever we head to the ironing boards during my classes, I usually have to remind my newbies to press rather than iron. Because most of us iron our clothing (and hate it!), we attempt to do the same thing with fabric. We iron...because it's fast and we want to get it over with. But there is a difference! When we sew and quilt, it's best to press!
Pressing: this is when you take the iron, put it on the fabric, hold it there, lift, move to another area, place the iron down, hold it there, lift, move to the next area, and so on. You press one area at a time.
Why Press? The problem with ironing is that the pressure and movement distorts the fabric and makes the fabric wonky. How so? The threads that make up fabric are woven in straight lines; when you iron, you push those threads all out of whack. So when you cut it, it looks fine; when you sew it looks fine; but when you wash the item and the fabric straightens itself back out, it doesn't look so fine. Then you have weird bumps and such. My friend who quilts refers to those bumps in order of severity: A cups, B cups, C cups...I think you get the point.
If you really struggle with wrinkles, use starch. And to make it even easier, remember that the heat from the dryer bakes in wrinkles, so when you wash the item or fabric, take it out of the dryer when it is damp and hang it.
Happy pressing!
Monday, March 5, 2012
Thread Storage
I've seen lots of pictures of cute and colorful sewing rooms with sassy thread displays and often wondered if I was a thread hoarder. I have at least 10 spools of various shades of light pink and probably five more of fuchsia ... in addition to the millions of other spools that are scattered around my studio. Do these people even sew? Because there is no way I could begin to fit my thread it cute little glass containers.
My mother, who sewed professionally, didn't have a lot of thread (she stuck with the basics), but what she did have was hung on a brown pegboard that was next to her machine in her sewing room. When I first started sewing, that's what I did. I spent time sorting and hanging and color-coding and re-organizing and it looked colorful and fun. Plus my thread was within arm's reach - and I love ergonomics. Then about a year or so later, I took my machine in to be serviced and got a lecture on dust.
It seems that when I hung my thread on a peg board, all the dust from my sewing room collected on the spools. That dust was depositing itself into my machine. Not a good thing. So I learned that I needed to keep my thread away from dust, heat, and humidity. So I started paying attention to how others stored their thread. When I took an embroidery class, I noticed thread stored in a small plastic Sterliite drawer unit. I bought some of those and did exactly that. Problem solved.
Here is the area next to my sewing machine. Most of my thread is in the Storage Drawer Cart. I used some spray glue to adhere pieces of fabric on the front to make it look a little neater.
But then I had lots of new thread that I wasn't using yet - thread that I stocked up on when it went on sale. So one morning during breakfast, I put on my thinking cap and asked myself, "What container is free, unbreakable, and transparent?" And the answer was staring right back at me: peanut butter jars.
Here are the jars in the drawers.
Right now this works for me. Because my studio is a public area, I keep my own thread hidden away. If this was my home studio, I'd probably have these hung on a wall somewhere.
It reminds me of my dad's workroom with babyfood jars hung from the ceiling (the lids were screwed in the floor joists and the jars twisted on). I think it would look amazing to have the lids of my peanut butter containers screwed into a painted piece of wood (framed, too), then have the jars screwed into the lids. Hung on the wall? It would look like a piece of art!
Wednesday, February 29, 2012
Learn to Sew: Thread
Last week, I had a reader ask a question about thread. So I thought I'd expand on my reply. Thread (along with needles) are a very important but often overlooked part of sewing.
First of all, if you live near a fabric shop (not a chain/big-box store), talk to them. They know their brands and can recommend the best thread for your project. Most fabric shops cater to quilters who typically use 100% cotton thread; if you are making clothing, home dec, or accessories, cotton thread may not be your best choice. BUT...they can help you with that.
But I'm guessing that, if you are reading this, your shopping is limited to Joann Fabrics, Hancock Fabrics, Hobby Lobby, etc. They carry popular, mass-marketed brands and a limited supply of specialty threads. And it may be overwhelming when you first glance at all those spools. Here is the low-down on thread that you'll probably find at those stores - I'm keeping it simple:
| Embroidery Thread |
2. Bobbin Thread: While you are looking at embroidery thread, you'll see bobbin thread. This is thread for an embroidery machine and to be used for machine embroidery. It's super fine and not designed for construction. It typically comes in two colors: white and black.
![]() |
| Serger Thread |
| Upholstery Thread (Black) and Top-Stitch Thread |
4. Upholstery and Top-Stitching Thread: Although these are different threads, you'll run into the same problem: they are thick. Threads come in different weights - the smaller the number, the thicker the thread. Most regular sewing thread is a 50 wt. Embroidery thread is 30wt to 40wt and so is upholstery and top-stitching thread. You can see this when you look at the thread....it just looks thick. So when you sew with this, it's adds bulk to your seams; plus it's often nylon...ick. Plus, you need a different needle to accommodate the thicker thread.
| Monofilament Thread |
5. Invisible/Monofilament Thread: You may not see this (ha! get it?!), but there is such a thing as invisible or monofilament thread. This polyester or nylon thread is designed to NOT be seen. It's not for construction, instead you'd use it for quilting when you don't want to see your stitches. It comes in different sizes (thickness) and can be tricky to work with.
![]() |
| Metallic Thread |
7. Glow-In-The-Dark Thread: Again, totally cool for decorative stitching, but not for construction. BTW, it really glows in the dark. It's great for applique on a Halloween tote bag!
![]() |
| Cotton Machine Quilting Thread |
![]() |
| All-Purpose Thread |
So there you have some of the basics of thread. There is A LOT more out there. To see a close-up of different thread (and better understand quality), please check out this article, complete with pictures!
Labels:
Finishing Touches,
Learn to Quilt,
Learn to Sew,
Notions
Friday, February 24, 2012
Sewing on Laminated Cotton and Iron-On Vinyl
| Insulated Lunch Tote |
| Cosmetic Bag with Brush Roll |
Two of my favorite classes/patterns are my Hey Sister! Insulated Lunch Tote and The Cosmetic Bag with Brush Roll. These two projects use laminated cotton and iron-on vinyl. Laminated cotton is regular cotton fabric that has been laminated at the factory; iron-on vinyl is a product that, when ironed on regular cotton fabric, adheres the vinyl to your fabric. The result is a light-weight laminated cotton fabric.
So here are my tips when sewing laminated cotton and iron-on vinyl.
1. Use a Walking Foot: I have sewn on clear vinyl and cursed my way through the project. Why? The fabric sticks to the bottom of the foot. So I've used tissue paper, post-it notes, and powder. BUT...I don't find that I have the same terrible problems with laminated cotton and iron-on vinyl; I just use my walking foot.
| This is topped with wax paper - to make brush holder. |
2. Use Goody Hair Clips: Pins put permanent holes in the fabric, so use Goody Hair Clips. These are a cheaper alternative to what you can find in the quilting notions department.
3. Use Quilt Basting Spray: If you need to hold layers together, spray it with Quilt Basting spray. It will be less likely to shift. With my projects, I needed to sandwich fabric and batting - so I just sprayed and stuck, then clipped!
4. Use a Sharp Needle: If your needle seems to struggle getting through the fabric/layers, switch to a Microtex/Sharp needle. It pierces the laminate better.
6. Watch the Iron!: It's tough to get wrinkles out, so press from the back - and cover with a pressing cloth. DON'T press the front - the hot iron will melt the vinyl! For the iron-on vinyl, you can put the protective paper over it and press it.
Subscribe to:
Posts (Atom)